Turkey is a bird that has long been associated with the holiday season. It is a symbol of the fall harvest, and in some cultures, it represents abundance.
In art, turkeys are often used as symbols of abundance and prosperity. In paintings, they are often depicted as symbols of Thanksgiving. They can also be seen in other arts, such as pottery and needlework.
Turkeys are magnificent birds with beautiful plumage, which might appear as an obstacle when drawing. However, this tutorial will show you how to draw a turkey step-by-step without failing!
And these are all the steps we’ll walk you through: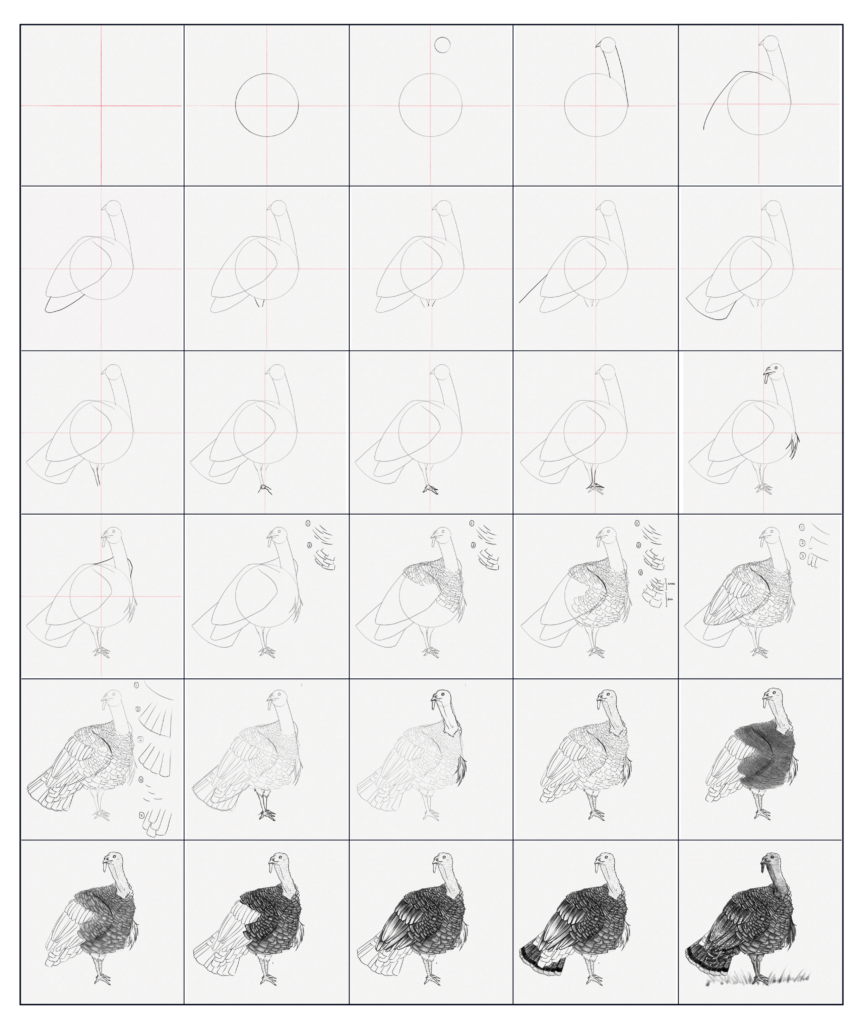
As an artist and bird lover, I’ve always been fascinated by the vibrant, intricate beauty of turkey feathers Their colors range from rich browns to iridescent greens and blues, with eye-catching patterns decorating each feather But while turkey feathers may seem dauntingly complex to draw at first, having the right guide can make capturing their detail surprisingly easy and fun.
In this step-by-step tutorial, I’ll walk you through my process for realistically drawing turkey feathers. With some basic supplies, a bit of patience, and by following the tips I share below, you’ll be creating gorgeous feather artworks in no time!
Gather Your Drawing Supplies
Before we dive into turkey feather drawing techniques let’s go over the recommended supplies
-
Drawing paper: For your base, use smooth Bristol paper or vellum in a larger size like 11”x14”. This gives you room for detail.
-
Pencils: Have a range of drawing pencils on hand, from 9H to 6B. Varied lead softness allows different effects.
-
Colored pencils: High-quality sets with a diversity of hues help capture turkey feathers’ full color range.
-
Paints: Watercolors or colored pencils both work well. Watercolors have a luminous effect, while colored pencils render opaque vibrancy.
-
Blending tools: Blending stumps, tortillions, or a colorless blender pencil will help you smoothly blend.
-
Erasers: Begin with clean lines. Have kneaded and plastic erasers available.
-
Ruler: A straight or adjustable triangle ruler keeps your feather shafts neat.
Structure Your Drawing with Guidelines
I like to start by very lightly sketching in structural guidelines. This initial framework ensures accurate proportions as you develop details.
To begin:
-
Draw an oval shape for the turkey’s body
-
Add a circle for the head
-
Sketch a basic feather shape extending from the body for the tail
-
Indicate the wing position with some simple angled lines
-
Outline the basic shape of the beak
Keep these foundation lines subtle. They’re just there to guide you as you sketch the turkey’s form.
Build Up the Body Structure
With your guidelines mapped out, start refining the turkey’s body structure.
-
Draw an oval for the eye, positioned on the side of the head
-
Add the snood dangling from the forehead and the wattle at the chin
-
Define the feathered texture of the wings
-
Develop the overlapping feathers of the tail
Take your time with this structural layer. Referencing turkey reference photos can provide helpful insight on proportions and anatomy.
Start Laying in Base Colors
Now we’re ready for the fun part—capturing the turkey feathers’ vibrant colors!
Wild turkey feathers span a rich spectrum of reddish-browns, creams, grays, metallic greens and rainbow iridescence.
To recreate this diversity, use colored pencils or watercolors to lay in the feathers’ base colors. Some tips:
-
Alternate light, medium and dark shades of each hue
-
Allow colors to flow into each other for a natural look
-
Use turquoise and purple to convey iridescent sheens
Building up these foundation colors will let you develop textures and details next.
Add Fine Details to the Feathers
This is where your drawing really starts coming to life! Take your time at this step to capture the intricacies of each feather.
Define feather patterns
Look closely at your reference photos. Note how the feather patterns radiate outward from the central shaft and soften towards the edges. Replicate this in your drawing, varying the pattern on each feather.
Create fluffy textures
To convey fluffiness, use short directional strokes. Referencing photo references helps see how feathers clump and overlap.
Shade softly
Keep your shading subtle, with gradual shifts in tone. This creates a soft, natural appearance. Blend carefully with a tortillion or tissue.
Brighten with sharp highlights
Add some bright white accents along edges to make them pop. Do this sparingly so highlights don’t overwhelm.
Bring Your Drawing to Life with Realistic Details
Let’s kick the realism up a notch! Observe turkey feather photos closely to add nuances like:
-
Drop shadows where feathers overlap
-
Blended color gradients within each feather
-
Peaks and valleys in the feather texture
-
Stray feathers breaking from the main shape
-
Scattered downy fluff filling gaps
Take a step back occasionally to assess if you have balanced fine details with the broader feather shapes.
Add Final Touches for a Polished Piece
You’re in the home stretch! Now’s the time to refine and perfect your turkey feather artwork.
-
Soften any harsh lines with a kneaded eraser
-
Brighten fades and dull areas with extra layers of color
-
Deepen shadows subtly for added dimension
-
Consider splattering small watercolor flecks for a textured background
-
Sign and date your finished feather drawing!
Careful observation as you progress allows you to translate the turkey’s intricate details into a vibrant, realistic artistic rendering. Mastering this sequential process takes patience, but the glowing satisfaction of completing a polished artwork makes the effort truly rewarding.
To supplement these written steps, I also recommend watching this excellent YouTube tutorial on drawing turkey feathers. The video format allows you to visually follow along with the feather rendering process:
https://www.youtube.com/watch?v=Ev6Oe2M7XaQ
From gathering supplies to building up colors and textures to adding those essential finishing refinements, recreating the artful depths of turkey feathers is an enjoyable challenge. With the guidance above assisting you through each phase of the drawing process, your patience and hard work will pay off in gorgeous, frame-worthy turkey feather artworks.
Frequently Asked Questions About Drawing Turkey Feathers
What drawing techniques help capture turkey feathers’ detail?
Using varied pencil pressures, blending colors smoothly, and adding directional shading strokes are some of the techniques that will help recreate turkey feathers’ intricate details. Referencing photos of actual feathers also provides essential visual insight.
What are the key colors used when drawing turkey feathers?
Turkeys display a spectacular range of hues, but some of the predominant colors are rich reddish-browns, creams, grays, iridescent greens, and metallic purples and blues. Varying the shades and tones of these colors brings them to life.
How can you make sure your proportions are accurate?
It’s very helpful to start by lightly sketching body and feather placement guidelines. You can then refine the proportions as you develop details. Having a turkey reference photo to glance at also helps keep sizes realistic.
Should you start with details or broader strokes?
It works best to start broad, fleshing out the basic feather shapes first. Once you have the overall form mapped out, you can zero in on the tiny nuances and textures that make the feathers so vividly realistic.
What supplies do you recommend for drawing feathers?
Good paper, an array of drawing and colored pencils, erasers, blending tools, and a ruler are essentials. Watercolors and a small brush are also helpful if using a colored wash technique. High quality materials allow you to render fine details.
Drawing feathers requires attentive observation, patience and skill. But a logical, step-by-step approach makes visually recreating turkey feathers’ stunning details enjoyable and achievable for artists of all levels. Follow the guidance above, allow time for practice, and you’ll soon be producing artwork that radiates your passion for these beautifully complex natural designs.

Step 6: Complete the wing
Draw another curved line following the shape below and complete the wing’s form.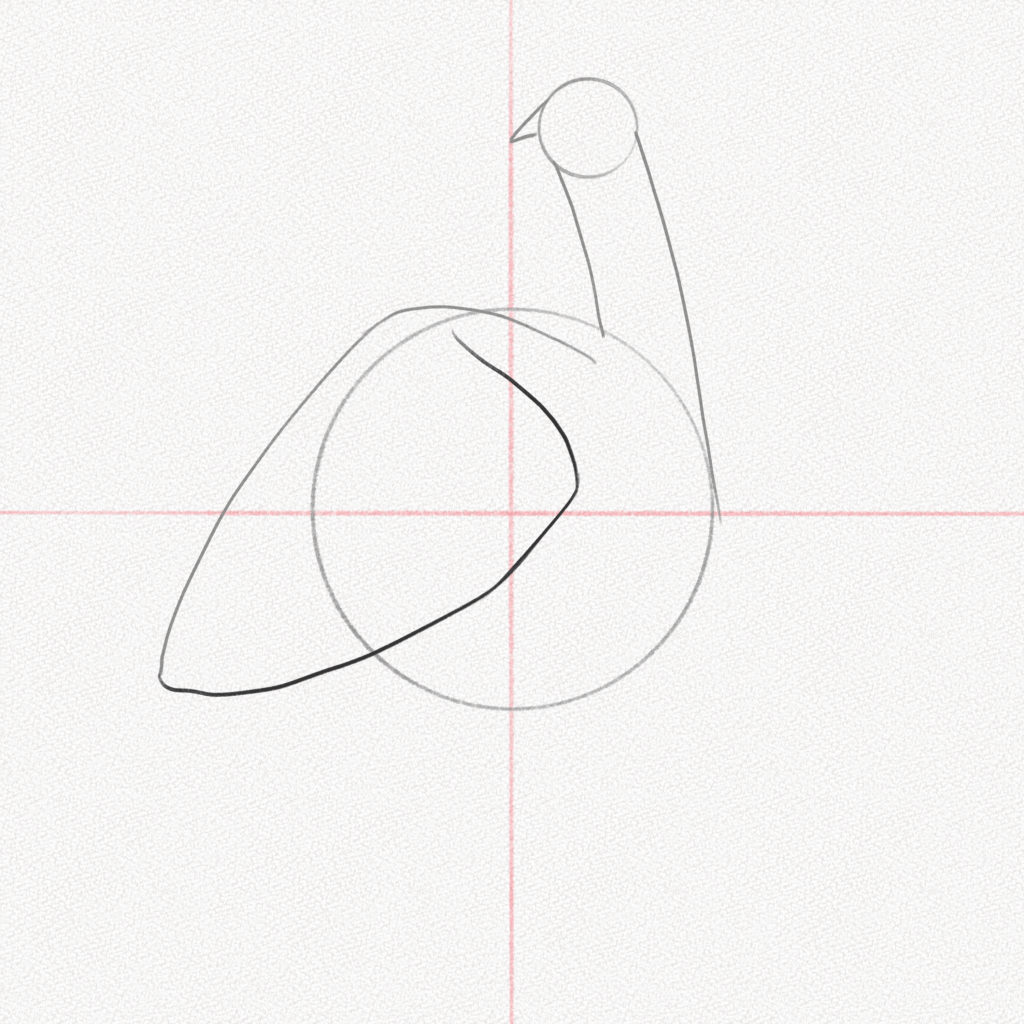
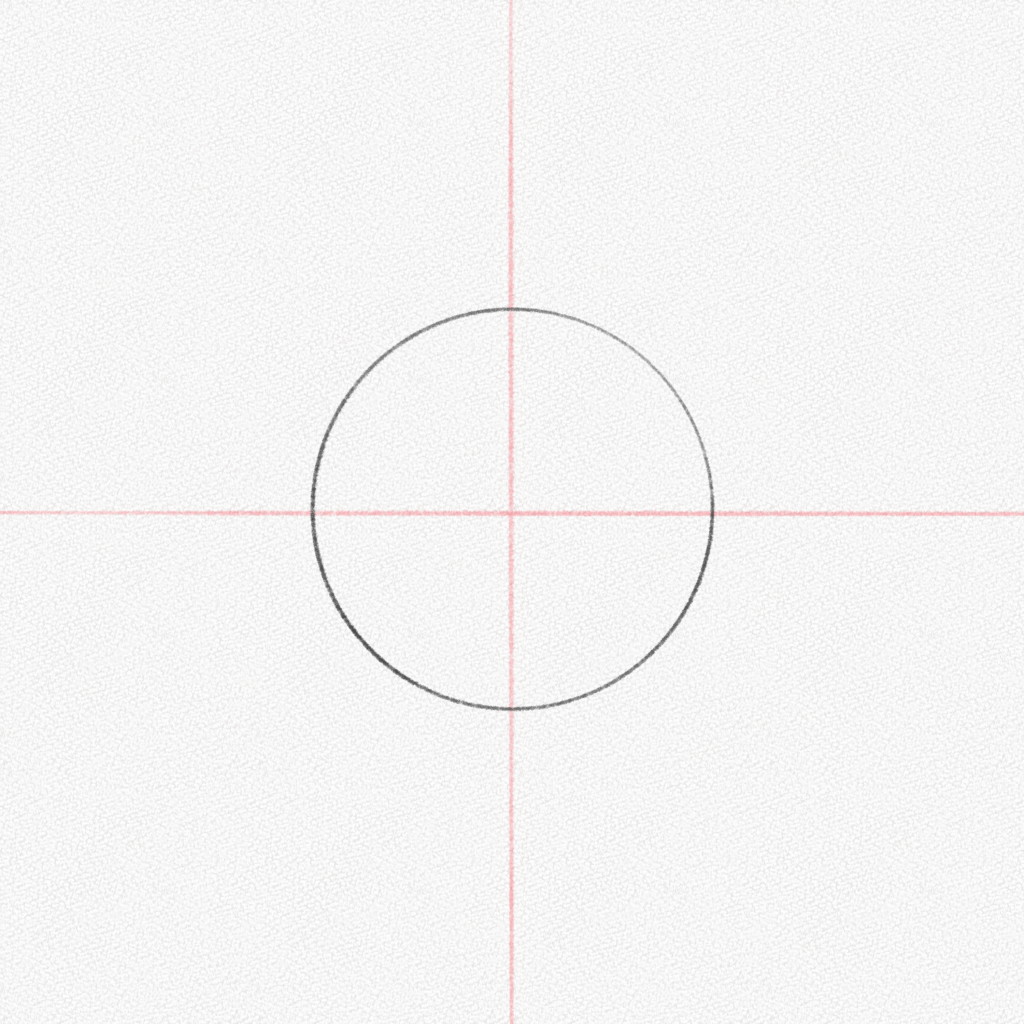
Step 2: Draw a circle
Draw a circle in the middle of your canvas, and use the lines we drew in the previous step as a reference to place them. This will be our turkey’s body.