Are you interested in brining a turkey, but aren’t quite sure how to do it safely? USDA is at your service! Though brining may sound like something only done commercially or by a certified chef, it’s quite simple with the right strategy — that means following safe food preparation steps.
Brining simply means to soak your turkey in a water and salt solution (the brine). Often, other ingredients are added to the brine, such as sugar, molasses, honey or corn syrup. The purpose of a brine is to produce a more tender and flavorful turkey.
According to research published in the Journal of Food Science, the salt in the brine dissolves a bit of the protein in the muscle fibers, and allows the meat to absorb the brine and retain moisture during cooking. This makes the poultry juicier, more tender and improves the flavor. There is no shortage of brine recipes, but in order to reap the benefits of brining, you must use the following safe steps.
Fresh turkeys can only be kept safely for one to two days, in the refrigerator. Let’s use a fresh whole turkey in our example and follow the four steps to safe food preparation:
NOTE: If you must rinse the turkey and clean out the cavity, first take the time to remove dishes, dish drainers, dish towels, sponges and other objects from around the sink area. Then cover the area around your sink with paper towels. Place the roasting pan next to the sink, ready to receive the turkey.
Clean the sink with hot soapy water, rinse well and fill it with a few inches of cold water. Even if the cavity is partially frozen, use cold water to rinse the cavity. Cold water is still warmer than the frozen cavity. Run the water gently to prevent splashing. Make sure the water is coming out the other end of the cavity. If it isn’t, the neck or giblets may still be in there.
And that’s it! No need to scrub or rinse the rest of the turkey. Hold the turkey up to let it drain into the sink and gently place the turkey in the roasting pan. Remove the paper towels, clean the sink and the area around the sink with hot soapy water, and proceed with your preparations. See To Wash or Not Wash.
Brining can be used with a variety of poultry and meats. See more food safety tips on brining, including suggested recipes in the Brining, Basting and Marinating fact sheet.
If you have questions about your Thanksgiving dinner, call the USDA Meat and Poultry Hotline at 1-888-MPHotline (1-888-674-6854) to talk to a food safety expert. You can also chat live at AskKaren.gov, available from 10 a.m. to 6 p.m. ET, Monday through Friday, in English and Spanish. If you need help on Thanksgiving Day, the Meat and Poultry Hotline is available from 8 a.m. to 2 p.m. ET.
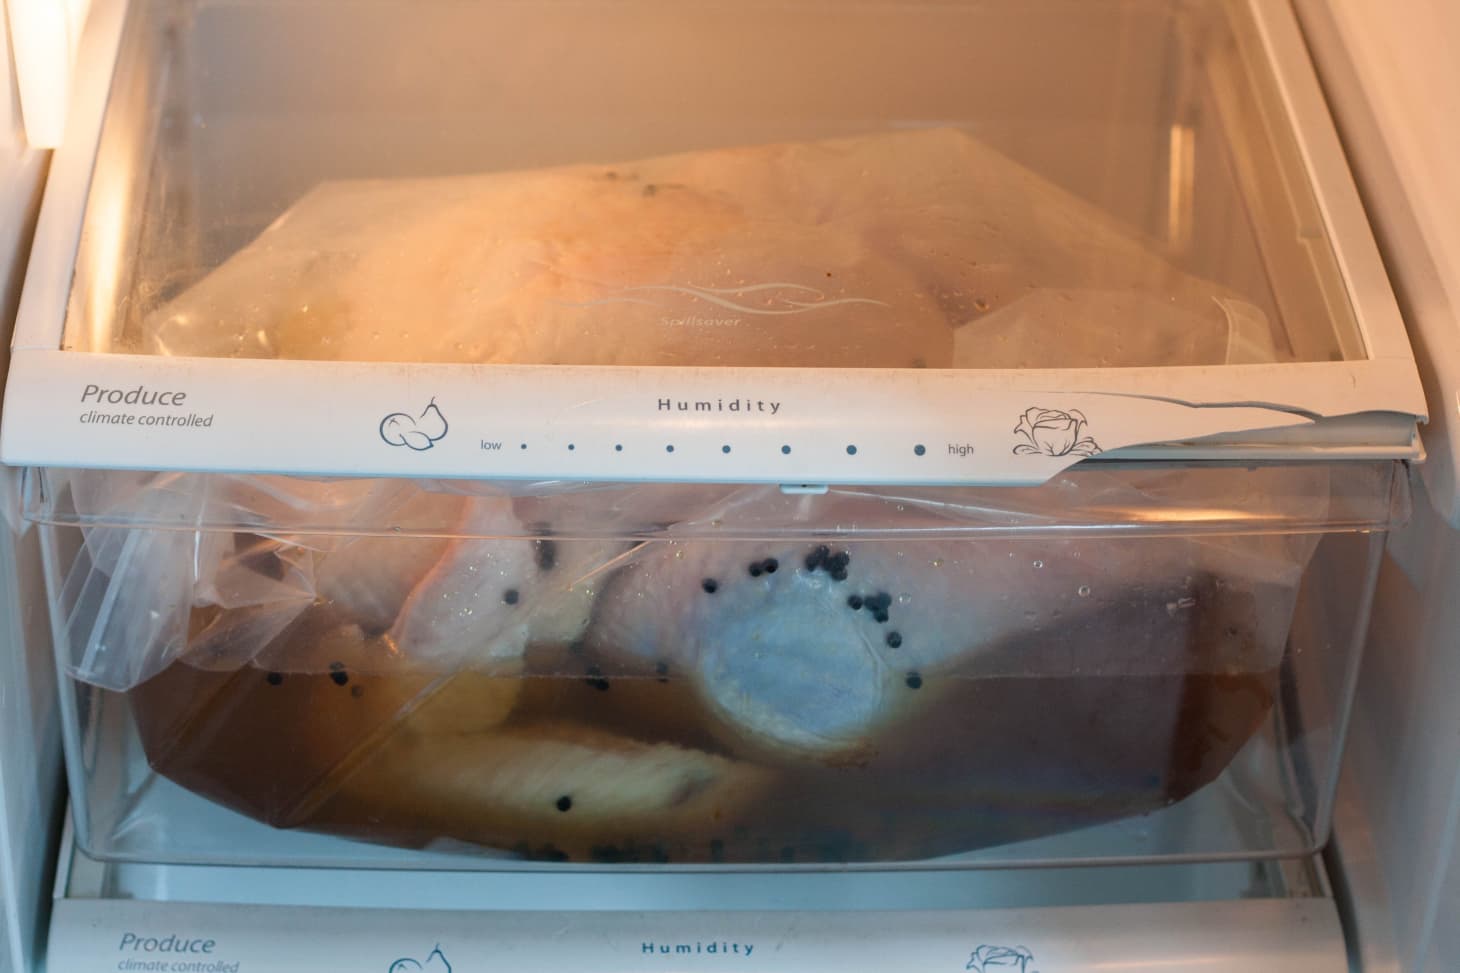
Brining is a great way to keep your Thanksgiving or holiday turkey moist, flavorful and tender. But finding enough space in the crowded refrigerator to submerge your bird can be tricky. The best place to brine a turkey is right in your fridge’s crisper drawer!
Why Brine Your Turkey?
Before getting into the specifics of how to brine in the fridge, let’s review why it’s worth the effort:
-
Moisture – Brining pumps extra moisture into the turkey meat through osmosis This prevents it from drying out when cooked.
-
Flavor – The salt sugars and aromatics infused into the meat make it more seasoned and flavorful.
-
Tenderness – Brined meat stays juicier, so it cooks up more tender and not tough.
So brining really takes your turkey to the next level!
Choosing the Fridge Drawer for Brining
You’ll need a large enough container to fully submerge the turkey in the brine solution. Here are your best options:
Use the Crisper Drawer
The crisper drawer is the ideal choice if it’s deep enough to hold your bird and brine. Remove the crisper’s glass top and shelves if needed to make space.
Benefits:
-
Already designed to contain liquids and leaks.
-
Keeps turkey colder than on a fridge shelf.
-
Drawer contains spills if the bag leaks.
-
Frees up shelf space.
Use a Brining Bag in a Large Roasting Pan
If the drawer is too small, use a brining bag inside a large roasting pan. The bag keeps the brine contained and the pan catches any leaks. Place it on the bottom shelf.
Benefits:
-
Allows you to brine even large turkeys.
-
Roasting pan takes up less space than a cooler.
-
Turkey stays cold on the bottom shelf.
Avoid Using a Cooler
While some advise brining turkeys in a cooler, this isn’t the best food safety practice. It’s hard to ensure the turkey stays at a safe 40°F temperature.
Steps for Brining in the Fridge
Brining in the crisper drawer or roasting pan set-up is simple. Follow these steps:
-
Make the brine: Dissolve salt, sugar and seasonings into cool water. Chill brine completely before using.
-
Prepare turkey: Remove giblets from cavities. Rinse turkey under cool water and pat dry.
-
Place turkey in brining bag: Double bagging prevents leaks. Tie bag securely closed.
-
Put turkey in container: Place bagged turkey in the crisper drawer or roasting pan, whichever contains it best.
-
Pour in brine: Pour chilled brine into container until turkey is fully submerged.
-
Refrigerate: Keep turkey immersed in brine for 8-24 hours (the longer the better).
-
Remove turkey: Take out brined turkey. Discard brine. Rinse turkey, pat dry and roast as desired.
Turkey Brining Tips
Follow these tips for best results when brining your holiday bird:
-
Chill brine before using. This helps keep fridge temperatures stable.
-
Keep the fridge below 40°F. Use a thermometer to monitor.
-
Weigh down the turkey to keep fully submerged in brine.
-
Plan ahead! Make brine 1-2 days before and allow 12-24 hours for brining time.
-
Use boiling water to fully dissolve the salt and sugar when making brine.
-
Stick to recommended brine ratios to avoid over-salting. Too much salt can make meat inedibly salty.
-
Rinse turkey well after removing from brine so exterior doesn’t get too salty as it cooks.
-
Let turkey rest in fridge 1-2 hours after rinsing and before roasting. This helps flavors distribute evenly.
Frequently Asked Questions
Get answers to some common questions about brining turkey in the fridge:
Is it safe to brine a turkey in the fridge?
Yes, it’s completely safe when kept at a temperature of 40°F or below. Monitor the temperature with a thermometer.
How long can you brine a turkey for?
For ideal flavor and moisture, brine for 12-24 hours. Brines over 24 hours risk making the meat too salty.
Can you brine a turkey too long?
Yes, overbrining can make the turkey inedibly salty and give it an unappetizing texture. Stick to brine times under 24 hours.
What’s the best turkey brine recipe?
A basic brine of 1 cup salt and 1/2 cup sugar per gallon of water works well. For flavor, add aromatics like peppercorns, allspice berries, thyme, garlic, lemon, etc.
What can I do if my fridge drawer is too small for the turkey?
Use a brining bag set inside a large roasting pan. The bag contains the brine and the pan catches spills.
Get Your Best Bird Ever with Brining
Give your next turkey the brining advantage by submerging it right in the fridge’s roomy crisper drawer. Follow these tips for moist, full-flavored and tender holiday turkey perfection. Brining the bird also frees up oven space on the big day – just one more benefit. Here’s to your best Thanksgiving turkey yet!