Every year, for the past 16 years, we’ve deep-fried a turkey for Thanksgiving. It took a near-accident around year 2 for us to realize that there must be a better way than to dangerously heat up 6 gallons of cooking oil on my front porch!
Cooking a whole turkey can seem like an intimidating task Many home cooks only roast a turkey once a year for Thanksgiving or Christmas dinner. Understandably, no one wants to mess up the centerpiece of a holiday meal! The good news is that new countertop oil-less turkey fryers make it easy to cook a moist, flavorful turkey with crispy skin. Read on to learn everything you need to know about using an oil-less fryer to cook the perfect holiday turkey
What is an Oil-Less Turkey Fryer?
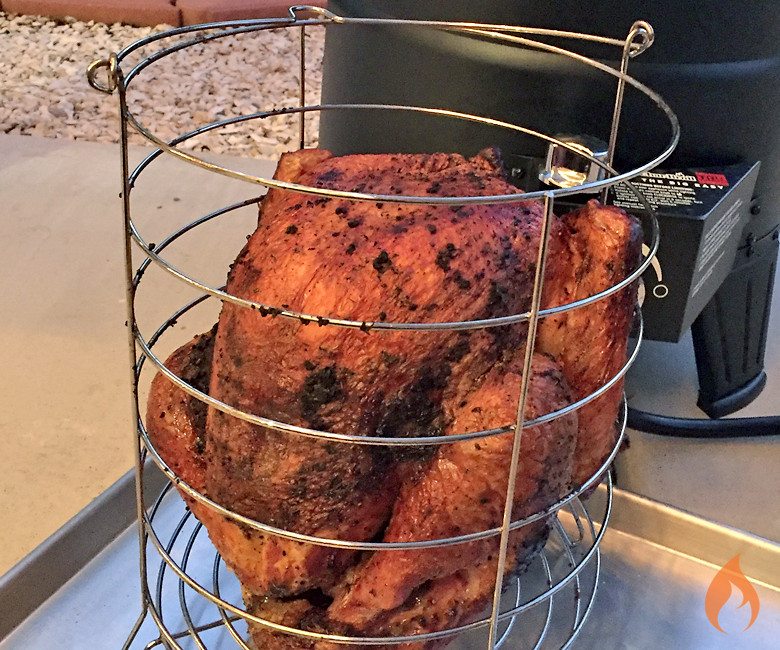
An oil-less turkey fryer is a countertop electric appliance that cooks turkey using radiant heat. It consists of an outer housing, a cooking pot, and a basket. The housing contains electric heating elements that heat the air inside to temperatures up to 450°F. This circulating hot air cooks food very quickly and evenly.
Oil-less turkey fryers work on the same principle as traditional deep fryers but without all the oil. The turkey sits in the basket, which gets lowered into the hot cooking pot. The indirect heat from the super hot air crisps up the skin while keeping the meat very moist and juicy.
Popular brands of oil-less turkey fryers include the Char-Broil Big Easy and the Masterbuilt Butterball Indoor Electric Turkey Fryer.
Benefits of Using an Oil-Less Turkey Fryer
Cooking turkey in an oil-less fryer has many advantages over oven roasting:
-
Juicy, tender meat – The indirect heat gently cooks the turkey from all sides, preventing it from drying out The meat stays incredibly moist and tender
-
Crispy skin – The hot circulating air crisps up the skin beautifully. It gets crackling crisp without needing to deep fry in gallons of oil.
-
Cooks quickly – Oil-less fryers can cook a turkey in about 8-10 minutes per pound, around half the time of oven roasting. A 14 lb turkey takes only 2 hours start to finish!
-
Easy and safe – There’s no need to watch a pot of bubbling hot oil. The fryers have safety features and auto shut-off.
-
Minimal cleanup – Without dealing with gallons of oil, cleanup is much easier. The cooking pot and basket just need a quick scrub.
-
Smaller turkeys work – Oil-less fryers can easily accommodate turkeys up to 16 pounds. You don’t need an extra large bird.
Turkey Cooking Tips
Follow these tips for the best results when cooking turkey in an oil-less fryer:
-
Choose the right size – Check your fryer’s manual, but turkeys up to 16 lbs usually work well. Larger birds may not fit or cook evenly.
-
Thaw completely – Make sure your turkey is fully thawed before cooking. Cold spots lead to uneven cooking.
-
Dry the skin – Pat the turkey skin very dry inside and out with paper towels. Dry skin crisps up better.
-
Season simply – Lightly coat the skin with oil or cooking spray. Season with just salt, pepper and poultry seasoning.
-
Use a thermometer – Cook until the thickest part of the breast and thigh reach 165°F.
-
Let rest before carving – Rest turkey for 15-20 minutes once removed from the fryer for juicier meat.
Step-by-Step Guide
Follow these simple steps for foolproof turkey cooked in an oil-less fryer:
1. Thaw and Dry Turkey
Remove turkey from packaging and thaw completely in the refrigerator if frozen. Pat the skin and cavity very dry with paper towels.
2. Season Turkey
Coat the skin lightly with oil or cooking spray. Season all over with salt, pepper and poultry seasoning. Tuck wing tips under.
3. Preheat Fryer
Assemble fryer according to manual instructions. Attach propane tank if needed. Turn heat to high to preheat for at least 10 minutes.
4. Add Turkey
Place seasoned turkey breast side up in fryer basket. Carefully lower basket into preheated cooking pot.
5. Cook Turkey
Cook for 8-10 minutes per pound, until breast and thigh reach 165°F. If browning is needed, place mesh lid on for last 15 minutes.
6. Check Temperature
Use an instant read thermometer to check temperature in breast and thigh. Cook until 165°F.
7. Remove and Rest
Carefully remove basket and turkey from fryer. Let rest 15-20 minutes before carving for juiciest meat.
8. Carve and Serve
Carve turkey and serve immediately with desired side dishes. Enjoy your juicy, crispy fried turkey!
Turkey Fryer Tips and Tricks
-
Brining is not necessary since oil-less frying keeps turkey very moist. But you can brine up to 24 hours for extra flavor.
-
For ideal crisp skin, air dry turkey uncovered in fridge overnight after brining/seasoning.
-
Cook stuffing separately to avoid undercooked centers. Cook inside turkey delays cooking.
-
Use cooking spray on basket so turkey doesn’t stick. Carefully remove basket when done.
-
Add broth, white wine or apple juice to bottom of cooking pot for extra flavor and moisture.
-
Cook aromatics like onion, garlic, lemon, herbs in pot to perfume turkey.
-
Use stock made from turkey wings, neck and giblets to make rich gravy.
Common Oil-Less Turkey Fryer FAQs
What size turkey can I cook?
- Most oil-less fryers can accommodate 12-16 pound turkeys. Some brands have extenders for larger birds up to 20 lbs.
How long does it take to cook a turkey?
- Cook 8-10 minutes per pound. A 12 lb turkey takes about 1 hr 15 minutes. Increase time as needed if cooking in very cold weather.
Do I need to inject or brine the turkey?
- Oil-less frying keeps turkey very moist. Brining is optional for more flavor. Injecting is not necessary.
Can I get crispy skin without deep frying?
- Yes, the hot circulating air crisps up the skin perfectly! Make sure skin is dried out well before cooking.
Is it safe to cook turkey indoors?
- Yes, oil-less fryers are designed for safe indoor use. There’s no dangerous hot oil.
What oil can I use to coat the turkey?
- Any neutral tasting oil works well. Vegetable, canola or olive oil are all good options.
How do I prevent turkey from sticking to the basket?
- Lightly coat basket with nonstick spray before adding turkey. Be very careful when removing basket after cooking.
Get Started with Oil-Less Turkey Frying
Cooking turkey in an oil-less fryer is a foolproof method for a picture-perfect holiday bird. The circulating hot air locks in moisture while crisping up the skin. Oil-less frying is much quicker and easier than oven roasting.
The countertop appliances take the guesswork and stress out of cooking turkey. In just 2 hours or less, you can serve up tender, juicy meat with crispy, crackling skin. Leftovers will keep well in the fridge for sandwich making.
This Thanksgiving and Christmas, skip the messy deep frying and give oil-less turkey frying a try! Your family will be amazed at the moist, delicious turkey you can turn out with minimal effort.
Why is Injecting Better than Brining?
- Skin stays dry, allowing for the skin to become extra crispy when cooked.
- Takes up less room in refrigerator
- Less messy than brining
- Takes less time than brining- brining takes 24 hours, injecting only takes a couple of hours. NOTE: Some experts say that you can inject and then cook immediately. I would not recommend this for deep frying turkey. The 2-hour resting time allows the marinade to settle into the turkey meat. Excess marinade will leak out, which is what you want it to do, instead of leaking out into your boiling hot oil (for deep frying) or in the cooking pot (for oil-less frying).
Here’s the Problem with Brining Turkey:
- Submerging the turkey in brine water means you won’t get super-crispy skin. The skin is full of water, the meat just under the skin is full of brine water. If you decide to deep fry turkey WITH oil…that combination spells trouble Water + massive vat of boiling oil = danger. Lowering a brined turkey (even if you pat the skin very dry) into the oil will produce skin-burning splatters. The oil will continue to bubble fiercely for at least 20 minutes. It’s dangerous.If you are making deep fried turkey without oil, the infrared heat will spend its time evaporating the water on the skin, instead of crisping the skin. Even if you are oven-roasting a brined turkey, it’s difficult to get crispy skin, even if you turn up the heat in the last stage of cooking.
- Brining a turkey in a cooler requires babysitting. You need to keep an eye on the temperature of the water, to ensure it doesn’t go above 40ºF. Have a bag of ice on hand and refill with ice as needed. Adding ice also means you’ll be diluting the brine, so you’ll have to add more concentrated brine solution. Also, do you have room in the freezer for a big bag of ice?
- Brining a turkey is a mess. The cooler has to be thoroughly cleaned and bleached before and after brining.
- If you are still set on brining, count on starting the brine 2 days prior to Thanksgiving. On day 1, brine. On day 2, discard the brine, pat the turkey very dry inside and outside. Place the turkey in a roasting pan, and refrigerate, uncovered, for at least 12 hours. This process will allow the turkey skin to dry, to help you produce that desired crispy skin.