Juicy, full of flavor, and even though its a 20 pounder, its gone the day after the holiday round here!
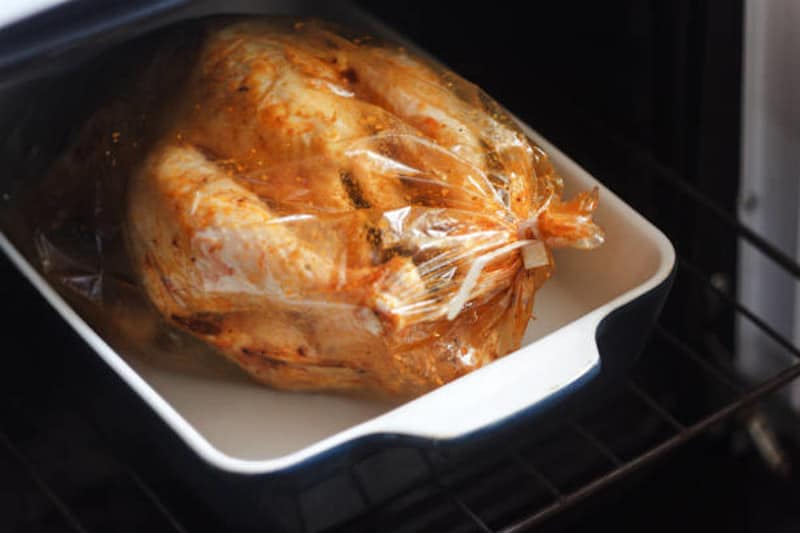
Turkey is the crowning dish on a Thanksgiving table. This recipe is all about having a moist and flavorful turkey thanks to a brine. The turkey sits in the brine for 30 hours and soaks up all the smoky and salty flavors. Pats of butter are put under the skin and slowly melt into the turkey. Using an oven bag helps the turkey maintain its flavor and moisture. — The Test Kitchen
Brining is a popular way to keep turkey meat moist, flavorful and tender for holiday roasts. But finding a vessel large enough to submerge the whole bird can be tricky. This is where oven bags come in handy! Oven bags are perfectly suited for brining turkeys, offering these advantages:
- Contain mess
- Speed up thawing
- Fit in the fridge
- Easy to handle
- Protect bird shape
Below we’ll cover everything you need to know about brining turkeys in oven bags. From tips for choosing the right bag to perfecting the brine ratio, you’ll learn the ins and outs of this easy and effective method.
Why Brine in a Bag?
Brining, also known as wet brining, involves soaking the turkey in a saltwater solution. This allows the bird to absorb extra moisture and seasoning, keeping it juicy when roasted. Typically this requires a large bucket or cooler big enough to fit the entire submerged turkey.
Oven bags offer a convenient vessel for brining Heavy duty oven bags designed for roasting turkeys have plenty of room. Features like a flat bottom and sturdy handles also make them ideal brining containers.
Benefits of brining in an oven bag include:
-
Contains mess – Brining can get messy as liquid spills over A bag neatly contains everything
-
Thaws turkey – Submerging the frozen bird in brine thaws it out simultaneously
-
Fits in refrigerator – Bags fold up compactly for fridge storage during brining.
-
Easy to handle – Handles make getting the turkey in and out simple.
-
Retains shape – Helps the turkey keep its form instead of spreading out.
As long as the oven bag is marked food safe, it works great for brining too. Next let’s look at some tips for success.
Tips for Brining Turkeys in Oven Bags
Follow these tips when brining turkeys in oven bags:
-
Use extra large bags – Look for bags made for 18-24 lb turkeys to allow room.
-
Place in a bin – Put the bag in a stockpot, bucket or cooler to support it.
-
Watch for leaks – Make sure there are no tears and tie it closed tightly.
-
Weigh down the bird – Place a plate on top to keep it fully submerged.
-
Chill thoroughly – Keep the entire container refrigerated while brining.
-
Brine 24 hours – For best results, let the turkey brine submerged for a full day.
-
Pat dry – Dry the skin thoroughly before roasting for crispy skin.
Now let’s go over how to mix up the perfect brine.
Creating an Ideal Brine Ratio
A basic brine is just water, salt, sugar and aromatics. But getting the ratio right is key. Follow these guidelines:
-
Use 1 cup salt per 1 gallon water as the base
-
Add 1/2 to 1 cup sugar to balance out saltiness
-
For aromatics, try peppercorns, bay leaves, herbs, citrus, garlic, onion, etc.
-
1-2 tablespoons of seasoning blends also add lots of flavor
-
Make sure the turkey is fully submerged in the brine
-
Chill brine before adding turkey and while brining
You can experiment with different flavor profiles. An apple juice or cider brine gives a nice sweetness. Brines with vegetable stock provide greater depth. Play around and find your favorite!
Step-by-Step Brining Method
Follow these simple steps for flawlessly brined turkey:
-
Mix together brine ingredients until salt and sugar fully dissolve. Taste and adjust seasoning.
-
Place turkey in oven bag and tie closed with provided twist tie.
-
Transfer tied oven bag to large stockpot, container or cooler.
-
Slowly pour brine into bag until turkey is fully submerged.
-
Weigh turkey down with a plate to keep fully immersed.
-
Refrigerate entire container for 24 hours, flipping turkey halfway.
-
Remove turkey from brine, pat dry with paper towels and roast as desired.
And that’s all it takes for a moist and flavorful holiday bird! The brined turkey is ready for roasting per your favorite recipe.
Frequently Asked Questions
What size oven bag do I need?
Choose an oven bag made for your turkey’s weight range. Allow extra room for the brine. Reynolds makes oven bags up to 24 pounds.
Can I brine a frozen turkey in a bag?
Yes, a frozen turkey can go straight into the brine. It will simultaneously thaw it out and infuse flavor. Add a bit more brining time.
What if my turkey doesn’t fit fully in the bag?
As long as the turkey cavity and most of the meat is submerged, partial exposure is okay. Rotate occasionally.
Do I need to clean or sanitize the oven bag first?
Nope! Oven bags are ready to use straight out of the package. Just inspect for any rips or tears before filling.
Can I reuse an oven bag for brining?
It’s best to use a new oven bag each time. Reused bags run higher risk of leakage during brining.
Get the Most out of Your Turkey
Brining is just one way to take your turkey to new heights of flavor. Here are a few other tips:
-
Dry brine – Rubbing salt under and on the skin boosts seasoning.
-
Flavored butter – Put compound butter under the skin for added moisture and taste.
-
Aromatic stuffing – Stuff the cavity with onions, apples, herbs and citrus.
-
Monitor temperature – Use a meat thermometer for perfect doneness.
-
Rest before carving – Let sit at least 15-20 minutes after roasting for juicy slices.
-
Make stock – Simmer the carcass to create your own turkey stock.
So go ahead and take advantage of those oven bags this holiday season. Brining your turkey in an oven bag makes the process easy and mess-free. With the right brine ratio and adequate brining time, you’ll enjoy a bird that’s tasty and tender down to the last bite.
How To Make turkey, brined and bagged!
-
1 Thaw your turkey, leave giblets and neck in it while brining it. Place in a clean cooler.
-
-
-
-
-
-
-
-
-
-
-
- Last Step: Dont forget to share! Make all your friends drool by posting a picture of your finished recipe on your favorite social network. And dont forget to tag Just A Pinch and include #justapinchrecipes so we can see it too!
Ingredients For turkey, brined and bagged!
- 1 turkey, thawed
- 16 c water
- 48 oz salt (iodized)
- 1 shot glass Worcestershire sauce
- 1/2 shot glass liquid smoke
- 2 Tbsp garlic (heaping)
- 1 lg onion (diced)
- 1 shot glass olive juice (from green olives)
- 1 Tbsp celery seed
- 1 Tbsp pepper
- 1 shot glass lime juice