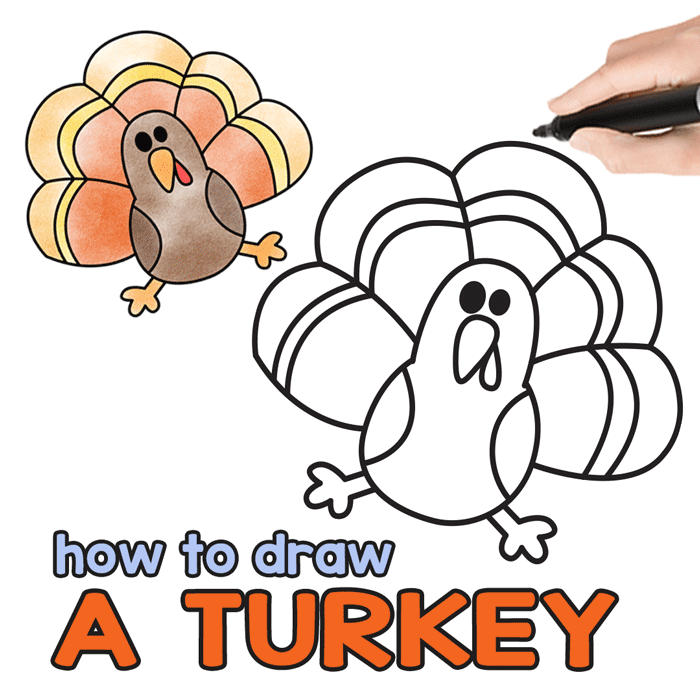
Learn How to Draw a Turkey with our Step by Step Turkey Drawing instructions. If you are a teacher and want to do a Thanksgiving project with your kids, why not teach them this? Perfect for beginners too!
Fall is not only time of leaves changing colors, it’s also the time of turkeys (well they are here all year round, just a bit more popular this time of the year).
Drawing a cute turkey is a fun art project for Thanksgiving or anytime! While turkeys have elaborate plumage, you can simplify the feathers to create a turkey with simple geometric shapes and lines. With just a bit of technique, you can learn how to draw an adorable turkey step-by-step even if you don’t consider yourself an artist
Supplies Needed
- Paper
- Pencil
- Eraser (optional)
- Coloring supplies (markers, crayons, colored pencils etc.)
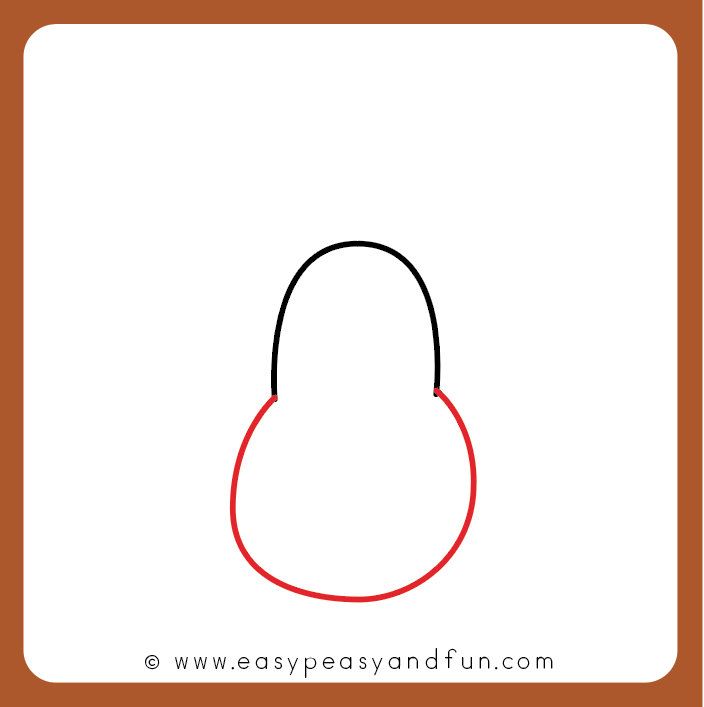
Step 1: Draw the Body
The body will be drawn as a large oval shape Lightly sketch the oval in pencil first before pressing down firmly Make sure to leave room at the top for the head,
Step 2: Add the Tail
The turkey’s tail will be a half circle extending down from the body. Draw the half circle at the lower back end of the oval.
Step 3: Draw the Head and Neck
Draw a guide line extending up from the body oval. Then draw a bean-like shape for the head, connecting it to the guide line for the neck. Add a small diagonal line for the beak.
Step 4: Draw the Face
In this step, add the facial details – round eye, small dot for the pupil, snood dangling from the beak, and double wattle under the beak The snood is the flap of skin over the beak, and the wattle is the red flap under the chin
Step 5: Add the Feet
Draw two small ovals for feet, emerging from the bottom of the body. Toes are optional.
Step 6: Draw the Tail Details
The turkey tail has long, fanned feathers. To create this effect simply draw 5-6 curves radiating from the base of the tail.
Step 7: Draw the Wing Feathers
On each side of the body, sketch a grouping of 5-6 slightly curved lines to form the wing feathers. Try varying the lengths.
Step 8: Add Body Texture
Lastly, use short strokes all over the body oval to represent the fluffy feather texture. Add smaller strokes on the head for slight feathered texture there too.
Tips for Drawing a Turkey
-
Lightly sketch shapes and lines at first, then go over them firmly once you have the placement right.
-
Look at photo references of turkeys to help with anatomy and details.
-
Simplify the wings and body feathers using rays and repeated lines. No need to draw every feather!
-
Use an eraser to correct any mistakes. Erasing as you go makes the drawing process easier.
-
The snood, wattle, and feet can be colored red or pink when done.
How to Personalize Your Turkey Drawing
Once you’ve mastered the basics, have fun customizing your turkey drawing:
-
Substitute a different shaped body, like a square or hexagon.
-
Get creative with the tail shape – try a lightning bolt, heart, star or another unique shape.
-
Add patterns or designs to the feathers. Plaid and polka dots are fun!
-
Put your turkey in a scene – sitting on a fence, in autumn leaves or corn stalks.
-
Dress your turkey up with a pilgrim hat, scarf or glasses for a silly personality.
-
Turn your turkey into a cartoon character by exaggerating features like a giant wattle.
-
Make a turkey family – add baby turkeys (poults) with smaller, fluffier bodies.
Drawing turkeys is an enjoyable way for kids and adults alike to express creativity while practicing sketching skills. In just 8 simple steps, you can learn how to draw a cute turkey from basic shapes. With the right artistic touches, you can even make Each unique creation show off your own personal flair!
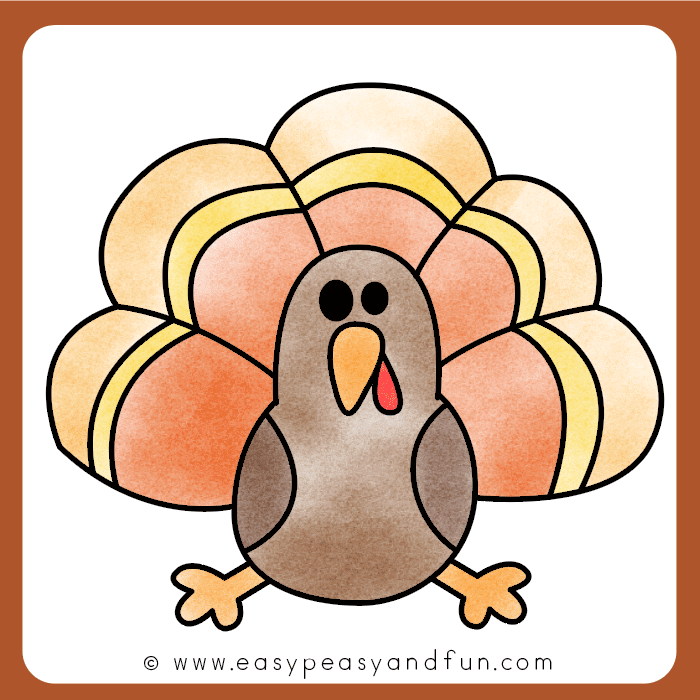
How to Draw a Turkey
What you need:
- one of our turkey guided drawing printables that you can grab from our members area (optional)
- paper
- pencil or marker
- coloring supplies
Step by Step Easy Turkey Drawing Tutorial

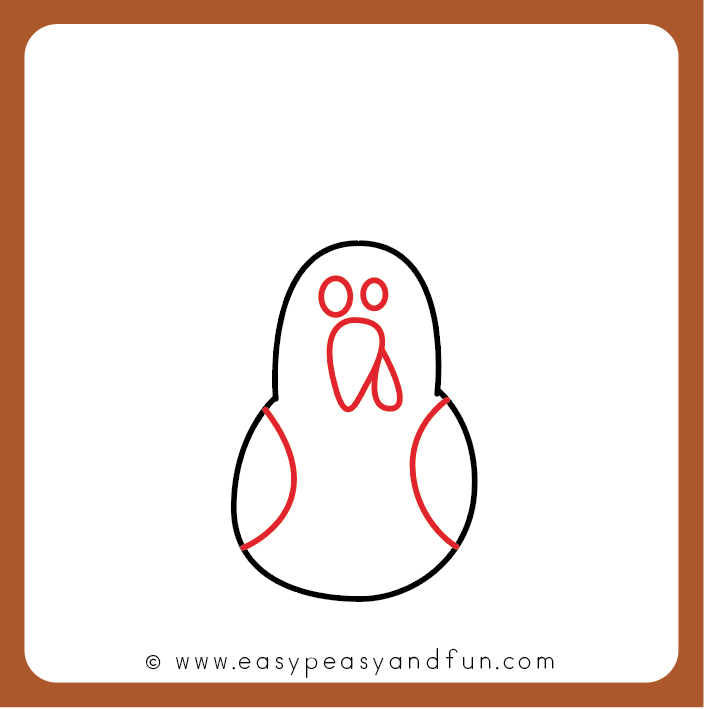
Start by drawing a inverted U :). This will be the head of the turkey.
Continue with the round shape under the head, this will make the body of your turkey.
You should be seeing a somewhat nice pear shape.
Draw eyes and beak (with details). Also draw two round shapes for the wings.
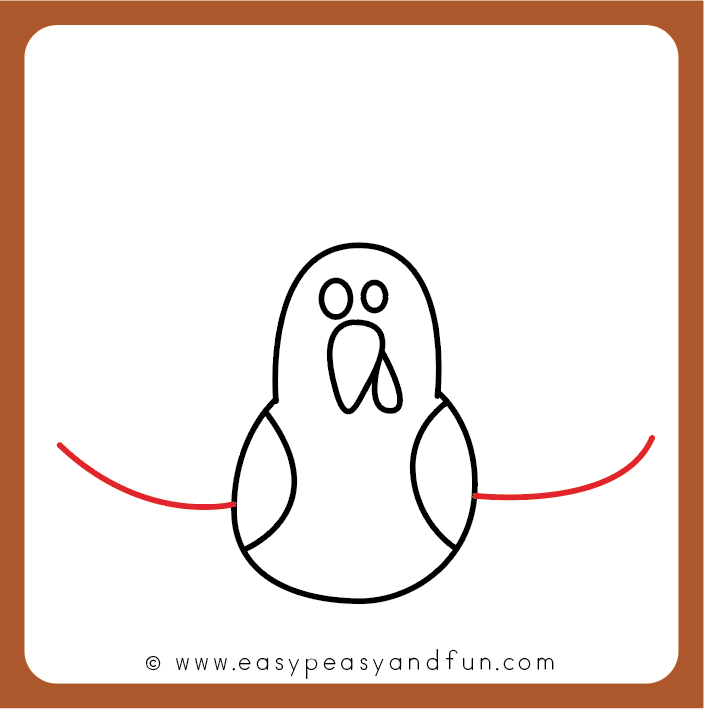
Time to start drawing those magnificent tail feathers. Start by drawing a curve on the left side and on the right.
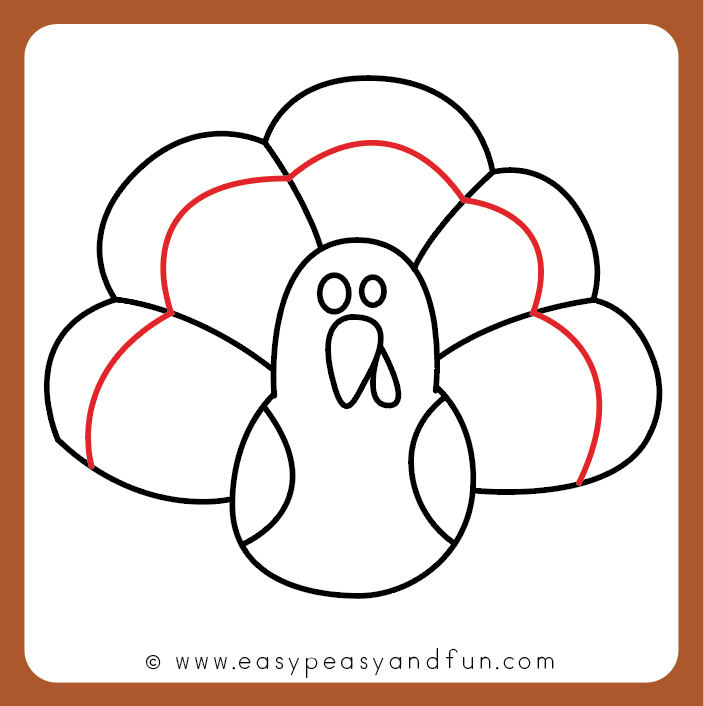
Connect the ends with a few arches (5 is ideal).

Draw a line from the “bottom” of the arch to the turkey body.

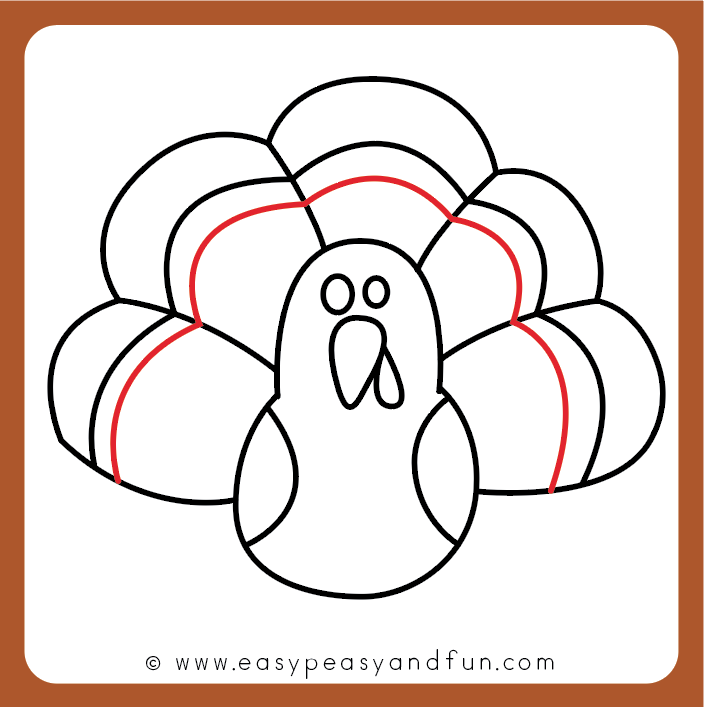
Next come the arches under the arches. Let’s draw those details on the tail feathers.
And another row under it.
Lastly, draw some turkey feet.
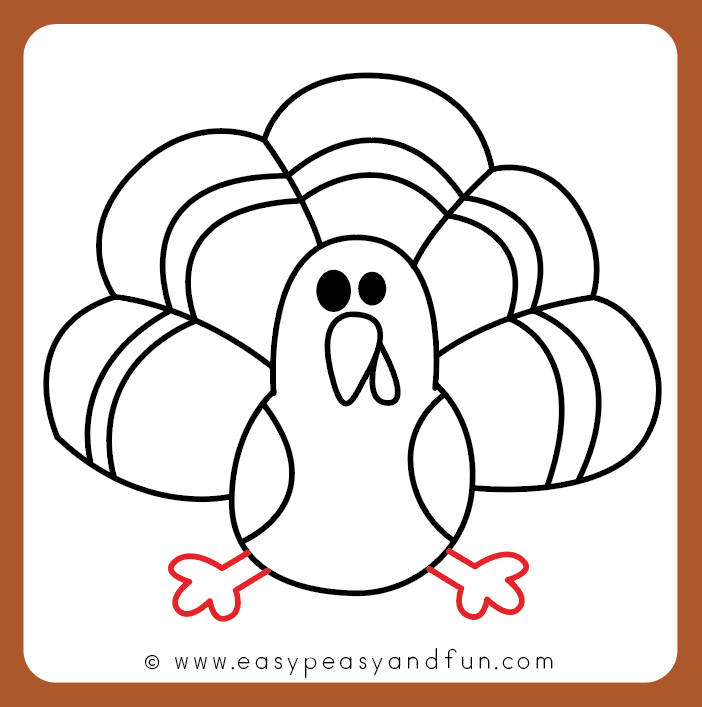
All done! You have learned how to draw an turkey. It was easy wasn’t it!
Color your turkey drawing.