This year I roasted a turkey for Thanksgiving for the first time, and – let me tell you – I had an absolute blast. For some reason, I was under the impression that cooking a turkey was this stressful process, with lots of complex steps, where so much can go wrong. I discovered that, in reality, roasting a turkey is a fairly straightforward process! After plenty of research and following some basic steps, I was completely blown away at the end result.
And I wasn’t the only one! I was so pleased with the feedback I received at Friendsgiving dinner that I have to share with you guys the secrets to my success! In this blog post, I have created for you a Beginner’s Guide to Perfectly Roasting a Holiday Turkey! This way, you can present a turkey to your family that you are PROUD OF, and avoid your Christmas dinner looking like that of the Griswald family LOL.
(Note: Don’t be intimidated by the length of this blog post! The process is very simple – but I give lots of detail for those of you who prefer more explicit instruction. If you want less detail click the Jump to Recipe button below for a more concise summary / my two minute recipe video!)
It’s a common question many have when preparing a whole turkey – do you need to remove the plastic parts like the pop-up timer and hock lock before putting it in the oven or smoker? There are differing opinions on this, but here are some general guidelines on removing plastic from turkeys before cooking.
What Are the Plastic Parts in a Turkey?
There are usually two plastic pieces that come inserted in a store-bought turkey:
-
Hock lock – This is a plastic band that goes around the turkey’s legs to keep them tucked together. It helps the turkey hold its shape
-
Pop-up timer – This is a small plastic indicator that pops up when the turkey is fully cooked. It’s meant to show doneness.
Both are made from heat-resistant plastic that is designed to stay in during roasting
Should You Remove the Hock Lock?
There are pros and cons to leaving the hock lock on or removing it before cooking:
Reasons to remove it:
- Can interfere with evenly cooking the legs
- Can make rubbing seasonings under the skin difficult
- Plastic in contact with food makes some people uncomfortable
Reasons to leave it on:
- Keeps the legs tucked neatly together
- Allows turkey to hold its shape better
- Made from oven-safe materials
Many cooks recommend removing the hock lock so you can season the legs fully and allow them to cook evenly. But others don’t mind leaving it on for convenience.
Should You Remove the Pop-Up Timer?
The pop-up timer is designed to be left in the turkey while cooking. But there are a few reasons you may want to remove it:
-
It can sometimes pop up prematurely or fail to pop up at all. So it’s not 100% reliable for determining doneness.
-
It may interfere with freely rotating and flipping the turkey while cooking.
-
If you are deep frying or smoking the turkey, it likely won’t function properly.
But for roasting in the oven, the pop-up timer is generally fine to leave in. Just be sure to confirm doneness with a meat thermometer too.
Tips for Removing Plastic Pieces
If you opt to remove the plastic parts from your turkey, here are some tips:
-
Use clean kitchen shears or sturdy scissors to cut the hock lock off each leg. Apply some pressure.
-
To remove the pop-up timer, clear away meat from around it with a knife before gently pulling it out.
-
Make sure to wash any tools that contacted raw turkey before re-using to prevent cross-contamination.
-
Once removed, tie turkey legs together with butcher’s twine or tuck wing tips under to maintain shape.
Should You Remove Other Plastic Inside?
It’s crucial to remove any plastic bags containing giblets or necks from inside the turkey cavity before cooking. Overlooked plastic can melt and release chemicals. Always check both cavity openings.
You should also discard any plastic wrapping or absorbent pads from around the exterior. Only the hock lock and pop-up timer are designed to stay in during cooking.
General Guidelines
Here are some general rules of thumb regarding plastic and turkeys:
-
Both the hock lock and pop-up timer are likely safe to leave in for roasting or smoking. But can remove for more control.
-
Always remove ALL plastic from inside the turkey. Check both ends thoroughly.
-
Do not cook a turkey with any plastic parts inside if deep frying. Remove them all.
-
Remove exterior plastic wrappings and absorbent pads which are not oven-safe.
-
Consult your specific turkey packaging for any additional guidelines.
While opinions differ, following basic safety precautions regarding plastic will help ensure your turkey cooks safely and evenly this holiday season.
Frequently Asked Questions About Turkey Plastic Parts
Here are answers to some common questions people have about dealing with plastic parts when cooking whole turkeys:
Is it ok to leave the pop-up timer in my turkey?
In most cases, yes you can safely leave the pop-up timer in when roasting or smoking a turkey. It’s designed to withstand oven and smoker temperatures. But it can fail, so verifying doneness with a meat thermometer is still recommended.
Can I microwave or deep fry a turkey with the pop-up timer still inside?
No, you should always remove the pop-up timer if microwaving or deep frying a turkey. It likely won’t function properly. And deep frying plastic could be hazardous.
Does the hock lock help the turkey cook more evenly?
The hock lock can interfere with even cooking, especially for the legs and thighs. Removing it allows seasonings direct contact and unobstructed heat circulation. But leaving it on does help maintain the shape.
Can I reuse and re-close the hock lock if I removed it before cooking?
No, the hock lock is designed for one-time use. Once removed before cooking, it cannot safely be re-closed and reused. Dispose of it instead of trying to reuse.
If I remove the hock lock, how should I secure the legs?
Tying the legs together with butcher’s twine works well to keep them tucked together after removing the hock lock. You can also tuck the wing tips under the body.
What’s the best tool to use to remove the plastic pieces?
Clean scissors or kitchen shears work well. Make sure to wash afterwards since they contacted raw poultry. A sharp boning knife also helps detach the pop-up timer.
Is it absolutely necessary to remove the plastic parts before cooking?
It’s not mandatory, but recommended for food safety and proper cooking. Leaving them in is generally considered safe, however, in an oven-roasted turkey.
Are there any other plastic parts I should remove besides the timer and hock lock?
Yes, you must remove any plastic bags containing giblets from inside the cavity before cooking. Also discard exterior plastic wrappings or absorbent pads.
If I cook my turkey with the plastic in, is it still safe to eat?
As long as it’s an oven-safe plastic designed to remain in during cooking, like the pop-up timer, the turkey should still be safe to eat. Just best to remove it first when possible.
Hopefully these tips help make your decision on removing plastic turkey parts much clearer. Trust your judgment, and your holiday bird will turn out perfectly tasty.
LEAD UP TO COOKING DAY
Brining a Turkey is a very polarizing topic. The theorybehind brining is to soak the turkey (before cooking) in a salty solution thatwill tenderize the meat and infuse moisture, leaving you with a flavorful,juicy bird. In my research, I discovered that turkey brining has about as many diehard advocates, as those who say it’s not worth the time.
Due to this mixed feedback (and the fact that it was myfirst attempt at roasting a turkey), I decided to get the best of bothworlds and buy a pre-brined turkey. This way, I’d leave the brining to theexperts, and spare myself the hassle of unnecessary preparation.
If you have the option, I highly recommend you buy a fresh, NOT a frozen turkey. This will save you SO much time and minimize error come cooking time. If your butcher does NOT offer fresh turkeys, there are two ways you can thaw your frozen bird.
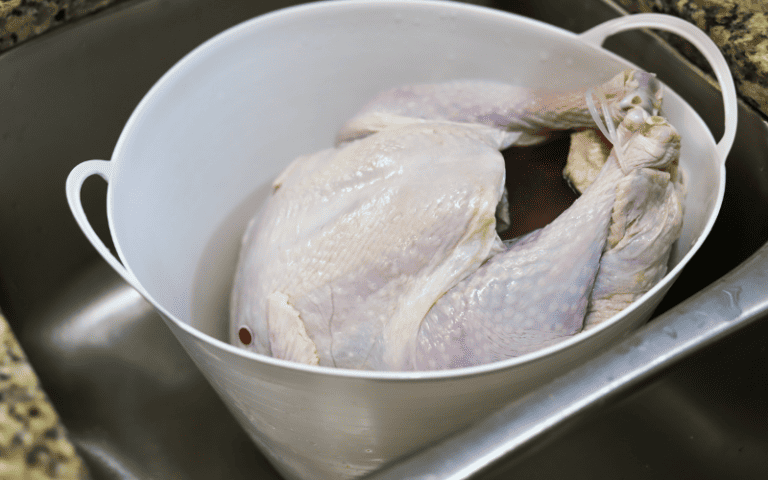
The first, and the faster, option is to soak the turkey in the kitchen sink with cold water. Keep the turkey in the original packaging, and change the water every 30 minutes to prevent the water from getting warm. You will know that the turkey is thawed when the bag feels soft.
Thawing Frozen Turkey in Cold Water: 8-12 lbs – 4-6 hours 12-16 lbs – 6-8 hours 16-20 lbs – 8-10 hours 20-25 lbs – 10-12 hours
If you have the foresight to buy a frozen turkey far enough in advance, you can also let the turkey thaw on its own in the fridge. This thawing method is less involved, obviously, but is bit of a slower process. See the thawing times below.
Thawing in Fridge: 8-12 lbs – 2-3 days 12-16 lbs – 2-4 days 16-20 lbs – 3-5 days 20-25 lbs – 4-6 days
The most important equipment needed to oven roast a turkey is a roasting pan. I bought this roasting pan on amazon for only $30. If you don’t have a roasting pan, you can also order a disposable aluminum foil roasting pan from Amazon, or buy from your local grocer. You can’t go wrong either way!
The only other supplies you may need are kitchen twine (to tie up the legs) and an oven safe thermometer.
Pro-tip: Buy the oven safe thermometer, as opposed to instant read thermometer, because you can leave it in the turkey throughout the entire cooking process, making your life easier (which is what this guide is all about!)
It’s cooking day! At this point, your turkey is thawed, andyou’ve obtained your cooking supplies – now, it’s time to get working on thisturkey.
First, remove the turkey from its packaging. Before you do anything – ANYTHING – I repeat, before you do ANYTHING. You need to remove the bag of giblets AND the turkey neck from the cavity of the turkey. If there is a plastic clip holding the legs together, remove this as well – it will melt in the oven, and we DON’T want that. Next, rinse both the inside and outside of the turkey with cold water, and pat dry with a paper towel. Set aside.
Get your roasting pan ready by placing a few handfuls ofroughly chopped celery, onion, and carrot in the bottom of the pan, and pouringin 2-4 cups of water. Lay the roasting rack back on top.
Before we lay the turkey on the roasting rack, we want to prep it with seasoning, fat, and aromatics that will infuse flavor into the turkey during the roasting process.
The first part of the turkey we want to focus on is thecavity. Liberally season the inside of the cavity with salt and pepper(Ratios on recipe card below). Really go crazy. Even if it seems like a lot Ipromise it is not. Scoop a few handfuls of your celery, carrot, onion mixtureinto the turkey.
This is about how much vegetables I inserted into the cavity!
Next, lets focus on the outside! Starting at the neck sideof the turkey, use a rubber spatula to loosen the skin from the breastand legs. Make sure that the spatula does not have sharp edge or you’ll rip theskin! For any areas that are harder to reach, use your hands.
Now that the skin is loose, spread ¼ cup of butter under the skin on the breasts and legs. After you’ve buttered under the skin, spread the remaining ¼ cup of butter on top of the skin, and then season liberally with salt and pepper.
Tie the two legs together with kitchen twine to keep thestuffing inside and tuck the wing tips underneath to keep them from burning(see my video!).
Note – legs tied with twine!
Wing tips BEFORE they are tucked
Wing tips AFTER they are tucked
This is the part of roasting a turkey that plagued me themost. I have included the below diagram to help you see exactly where to placethe thermometer. You are basically going to insert the thermometer in the seambetween the breast and the leg.

Make sure it doesn’t hit the bone, otherwise the reading will be off. The thermometer should read 165-170° F when the turkey is fully cooked. DON’T COOK TO 180-185° F (these are outdated cooking temperatures) – If you do your turkey will be very dry.
Cooking Times: 8-12 lbs (1.5-2.5 hours) 12-14 lbs (2.5-3 hours) 16-18 lbs (3.75-4.25 hours) 18-20 lbs (4-4.5 hours) 20-25 lbs (4.5-5 hours)
Before putting the turkey in the oven, place a layer of aluminum foil loosely over the breasts. This will prevent them from drying out before the rest of the turkey is cooked. Remove the foil half way through!
Once you remove the roasted bird and let it rest for 20-30 minutes. Then carve up and enjoy!!!!