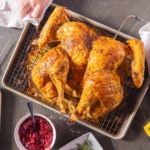
The turkey is the star of the show on Thanksgiving Day, golden and juicy. But it can also be problematic. It takes up space in the oven, for one thing. Doesn’t that bird know you have green bean casserole, sweet potatoes, and rolls waiting in line? Plus it is often overcooked, and half the skin—which we want ultra crisp—is soaked and squidgy at the bottom of the bird. But a little time-saving trick of laying the bird out flat while roasting is a complete game-changer on all fronts. If you’re the type of person who thinks outside the box with an affinity for the unorthodox, keep reading. This fast-roasting turkey method is for you.
The origins of the word spatchcock are vague and disputed, though it is generally agreed that the word comes from Scottish or Irish usages. No matter its origin, when the term is applied to whole fowl, it is equivalent to “butterflying.” We’ll do a deeper dive into the exact process below, but in essence, we flatten the bird out by removing the backbone and arranging the legs and wings around the breast, like rays shining out from a white-meat sun. This vastly increases the surface area, much improving it over the semi-spherical shape it originally inhabits.
“But what,” we hear you asking, “about the perfect turkey being brought to table to be carved by Grandfather?!?” And we suppose that is something of a fair question, but we would also remind people that Norman Rockwell was famous for being a painter, not a cook. Just because it’s pretty doesn’t mean it’s the best way to cook something! We’re not the only ones who think so, either.
Cooking a spatchcocked turkey can seem intimidating if you’ve never done it before. With the right techniques, timing, and temperature, you’ll have a perfectly cooked bird in no time. In this guide, we’ll cover everything you need to know to cook a 20 lb spatchcocked turkey, from prep to carving.
What is a Spatchcocked Turkey?
Spatchcocking, also known as butterflying, is a technique where the backbone is removed and the turkey is flattened out This allows the turkey to cook more evenly since the thighs aren’t shielded by the body.
The benefits of spatchcocking a turkey include
- More even cooking and browning
- Crispier skin as it’s fully exposed
- Shorter cooking time compared to roasting a whole turkey
- Easier to carve when cooked
How Long Does it Take to Cook a 20 lb Spatchcocked Turkey?
A general guideline is to roast a spatchcocked turkey for around 11-15 minutes per pound at 350°F. For a 20 lb bird, this equals a total cooking time of around 3 hours 45 minutes to 5 hours.
However, we always recommend using a meat thermometer to determine doneness rather than relying solely on time. The turkey is done when:
- The thigh meat registers 165°F
- The breast meat registers 150°F
The thickness of the breast can impact cooking time. If your turkey has a very thick breast, it may take closer to the 5 hour cooking time. Monitor the temperature and tent with foil if the skin gets too brown before the interior is cooked through.
Step-by-Step Guide
Follow these simple steps for perfectly cooked spatchcock turkey every time:
1. Prep the Turkey
- Remove giblets and neck from cavities
- Rinse turkey under cold water and pat dry with paper towels
- Place breast side down on a cutting board
2. Remove the Backbone
- Using sturdy kitchen shears, cut along one side of the backbone from tail to neck
- Repeat on the other side to remove the backbone completely
- Reserve backbone for making stock
3. Flatten the Bird
- Turn breast side up and press firmly on the breastbone to flatten
- Tuck wing tips under breasts to hold them in place
4. Season the Turkey
- Gently loosen the skin from the breast and rub olive oil underneath
- Season generously under and on top of skin with salt and pepper
- You can also stuff aromatics like herbs, lemons, and garlic under the skin
5. Roast the Turkey
- Heat oven to 350°F
- Place turkey on a rimmed baking sheet lined with foil or a roasting rack
- Roast for 11-15 minutes per pound, about 3 hours 45 minutes to 5 hours
- Baste occasionally with pan drippings
6. Test for Doneness
- Temperature should be 165°F in thighs and 150°F in breasts
- Juices should run clear when pierced with a fork
7. Let Turkey Rest
- Allow turkey to rest for 20-30 minutes before carving
- This helps juices redistribute for moist, tender meat
8. Carve and Serve
- Carefully slice breast meat and transfer to a platter
- Cut legs and thighs into pieces; add to platter
- Pour pan drippings into gravy boat for serving
And you’re done! With this easy spatchcocking method, you’ll have a picture-perfect turkey ready in half the traditional roasting time.
Turkey Roasting Tips
Here are some extra tips to ensure roasting success:
- Start with a fully thawed turkey – thaw in the refrigerator for 24 hours per 4-5 lbs
- Let sit at room temperature for 30 minutes before roasting
- Use a low-sided roasting pan to allow air circulation
- Tent with foil to prevent over-browning if needed
- Baste every 30 minutes with pan drippings
- Make sure oven rack is centered and oven is preheated
- Use a meat thermometer for accuracy
FAQs
Should I brine the turkey?
Brining is optional but can make the meat even juicier. Dissolve 1 cup salt per gallon of water and submerge turkey for 12-24 hours. Rinse and pat dry before seasoning.
What if my turkey is larger than 20 lbs?
For larger birds, plan on cooking for 14-15 minutes per pound. The longer time helps ensure the thicker breast cooks through.
Can I stuff a spatchcocked turkey?
Stuffing is not recommended for food safety reasons. Cook stuffing in a casserole dish so it reaches a safe internal temperature.
What temperature should I cook stuffing to?
Cook stuffing in a baking dish to an internal temperature of 165°F. For moistness, mix in broth and bake covered before uncovering to brown.
What are the best side dishes with turkey?
Classic pairings like mashed potatoes, gravy, green bean casserole, roasted vegetables, cranberry sauce, and dinner rolls are perfect complements.
Get the Perfect Spatchcock Turkey Every Time
Cooking turkey can feel daunting, but spatchcocking makes it so much easier. With the simple tips in this guide, you’ll have a show-stopping centerpiece ready in no time. Just remember to use a meat thermometer for the most accurate doneness.
Happy cooking and gobble gobble! Let us know how your spatchcock turkey turns out.

Preferred by people who know
Mark Bittman of the NY Times, and the author of How to Cook Everything, once put together a minimalist Thanksgiving dinner to cut down on prep, cook time, and ingredients so he could have time and energy to actually enjoy the meal with family and friends. This method was part of it. Bittman’s first spatchcocking video made its appearance in 2008. Since then a number of celebrity chefs have also applied the same method, with spatchcocking becoming an official foodie trend by 2012.
Kenji Lopez-Alt is another chef who swears by a flat bird! His discussion about and recipe for a spatchcocked turkey and many others can be found in his book, The Food Lab.
Cook after cook, professional after professional—people who know prefer the spatchcock method.
- It’s a Timesaver: To take the time out of the turkey roasting process, Mark splits and flattens out the turkey. With the turkey flattened out, the amount of exposed surface area increases and the overall thickness of the bird comes down to a nearly even level. With this preparation, you can blast the turkey at a higher oven temperature to expedite the cooking process. Depending on the size of the bird, it could take only 45 minutes to cook all the way through. Spatchcocking addresses the issues of not only time, but oven space too. With the turkey flattened out, you’ll still have room in the oven for pies, rolls, and anything else you may be baking.
- Flat Shape = Even Cooking: A turkey is pretty much spherical in shape; no wonder there are issues with even cooking! In a spatchcocked turkey, the legs will be far more exposed than a turkey in its natural shape. This is great because the dark meat needs to reach a higher temperature than the light meat in the breast.
- Juicier Meat and Crisper Skin: On a spatchcocked bird, all of the skin is facing up and fully exposed. This will result in a turkey with crackling crisp skin and even browning all around. As the juices render from the skin, they help keep the meat nice and moist.
- Better Gravy: With removing the backbone, you have another component to add flavor to your gravy. Make a quick stock using the neck, giblets and backbone, and use that in addition to the drippings from the turkey to make your gravy. No need to use store-bought chicken stock to make the gravy. (Not that you’ll need gravy for your bird … you won’t. But you will need some for your potatoes.)
- The Drippings: Oh, the drippings! Fill the bottom of your sheet tray with carrots, celery, onion, parsnip, turnip, green apple, herbs, and lemon. As you cook your bird, the juices and butter (don’t forget the butter) run down, not into the bird’s own cavity, but into a hot pan filled with aromatic goodness. The veggies braise and cook in the juices, producing the BEST pan sauce ever. No need for thickener, no need for gravy. Just dip the meat in this stuff, scoop up the veggies with it, and you’ll never want to cook your bird another way.
Disadvantages:
We’ve exhausted the good points of this method, but what are the drawbacks? The most common complaint about spatchcocking is that it “just doesn’t look right”. Well, we’ve already established that we don’t need to hold onto that piece of ill-gotten nostalgia. The only real drawback is the anatomical aspect of the process. It could be deemed … unpleasant. For the squeamish. But really, it’s quite satisfying once you give it a try.
Enough talk about why spatchcocking is so great. It’s so much easier than you might think! All you need are a cutting board, poultry shears, and a chef’s knife. As long as you’re not squeamish to the sound of bones breaking, it’s a cinch.
Follow These Easy Steps:
- Pat the turkey dry and place it backbone side-up on a cutting board.
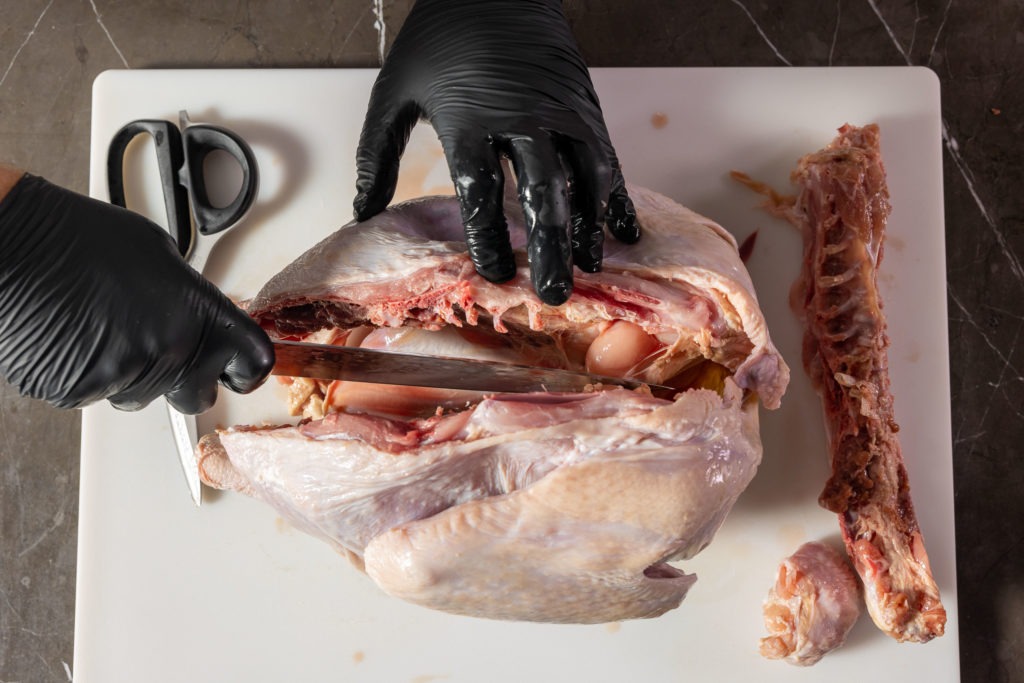
- Use poultry shears and cut on either side of the backbone, starting from the bottom cutting up toward the neck. If you get to an area that you can’t get through with the shears, use a knife to crack through. You have now removed the backbone. Set aside to use when making your gravy.
- Make a cut either down the center of the breastbone or one cut on either side of it. Turn the turkey breast side up.
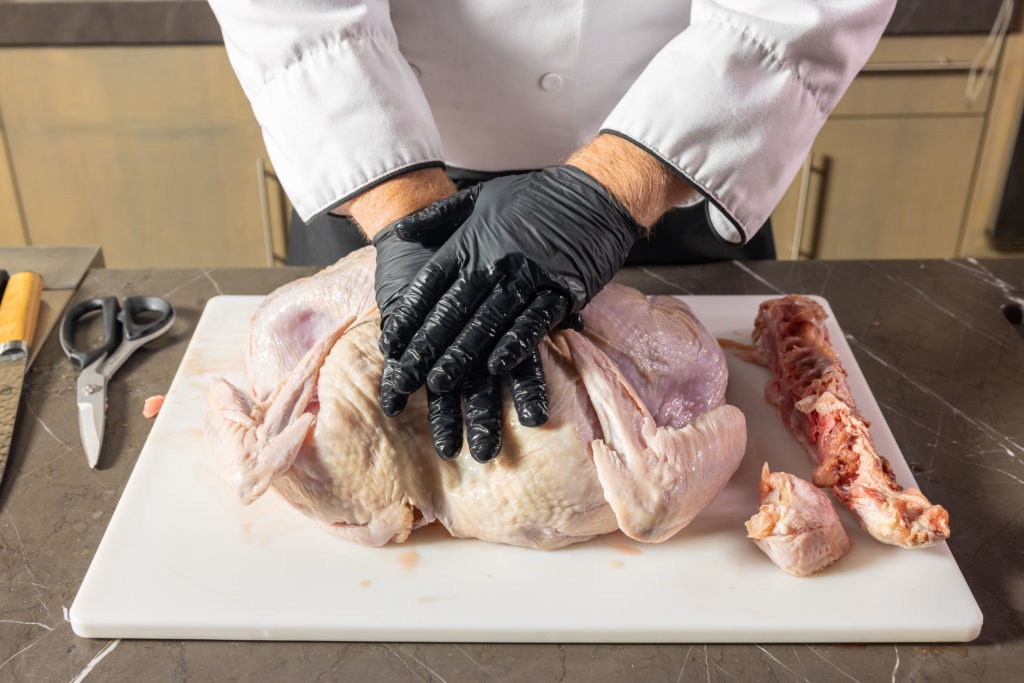
- Flatten the bird out by pressing down on the breastbone with your palms, and break it (ribs will break too). You may need to stand on a stool for more leverage.
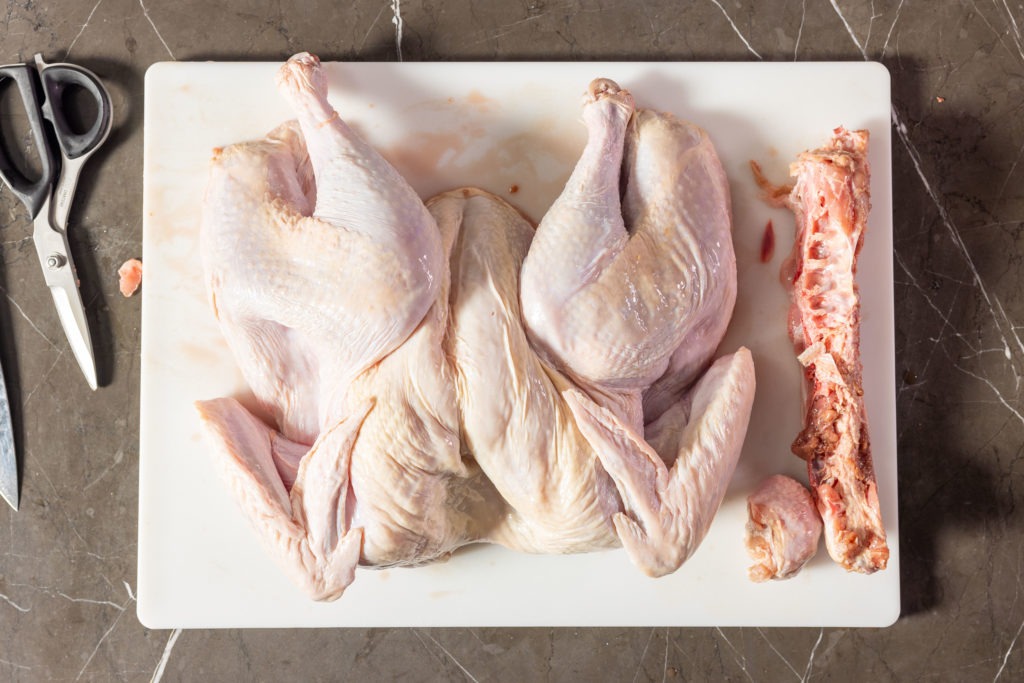
- Tuck the wings under and move the legs out toward the side. Trim the excess neck skin. Your bird is now spatchcocked and ready to go.
Spatchcocked turkey roasting temp
Once your bird is well flattened, it’s time to roast. Cook your bird at 425°F (218°C) until it reaches an internal temperature on your ChefAlarm® of 155°F (68°C). (If that seems low, read our article on chicken internal temps—the same concepts apply to turkey as they do to chicken. Trust us, a turkey cooked to that temp will be WAY juicier than one cooked to a higher temp.) Verify that temperature with your Thermapen® ONE to make sure you don’t find any lower temperatures. If you don’t, you’re done! Chances are you’ll have cooked a 16-pound turkey in about 90 minutes. Wow!
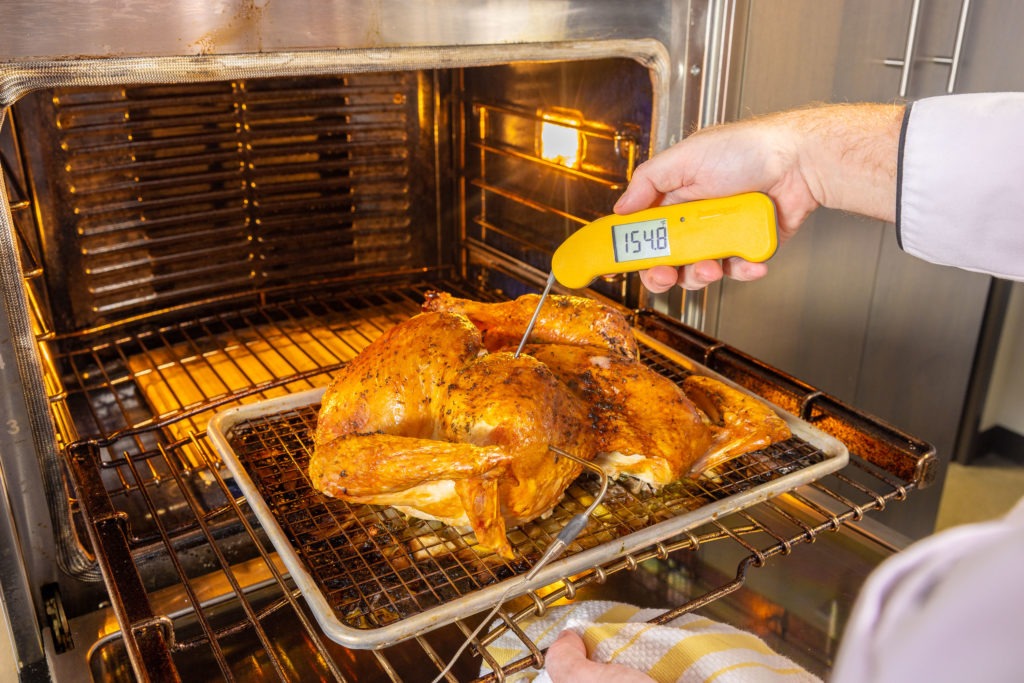
We hope you give this unorthodox turkey a try. It is better in every way and will provide you with a turkey that people will actually enjoy eating, not just pretend to like. Stick to our recommended temps, don’t forget the aromatics, and you’ll be crowned Thanksgiving royalty, for sure.
