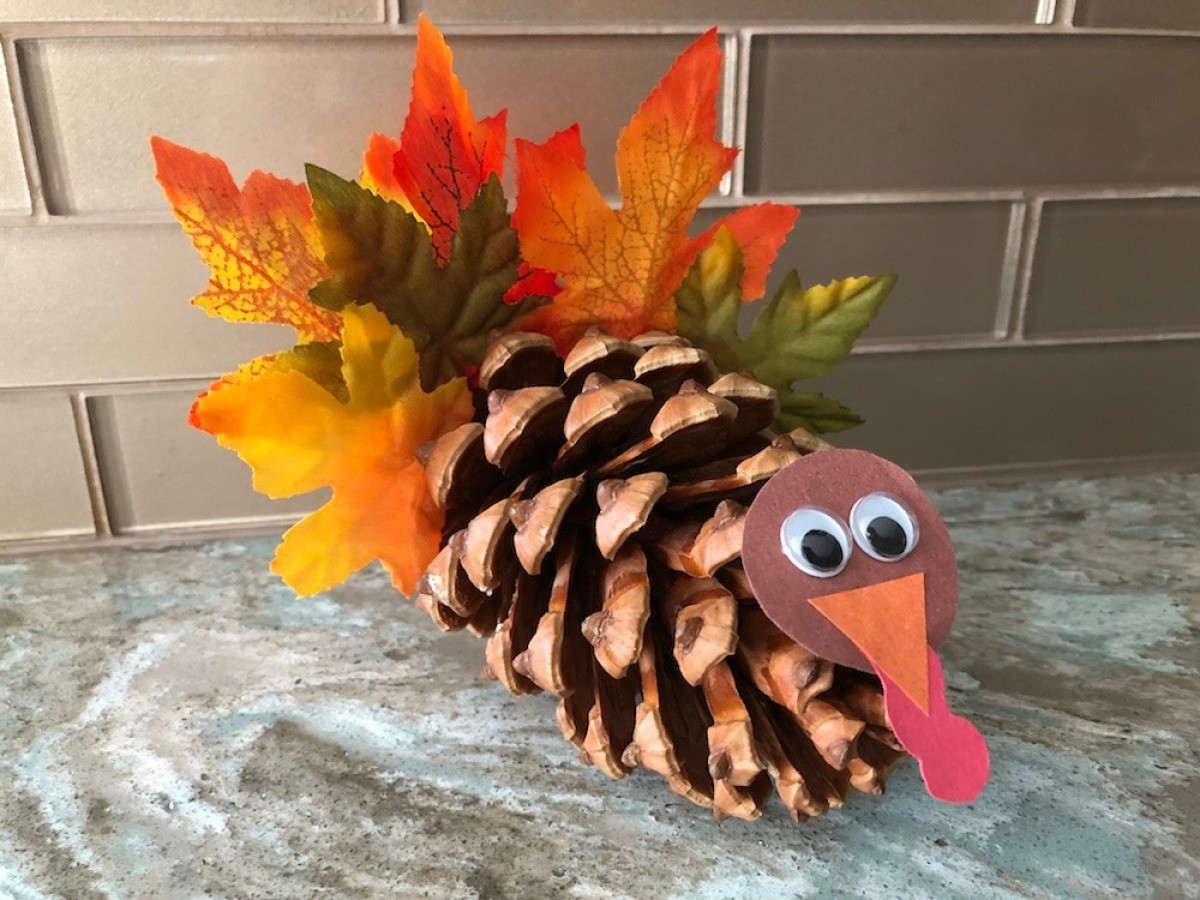
Thanksgiving is a time to gather with friends and family and reflect on all that we are grateful for. A fun way to get into the Thanksgiving spirit is by making festive crafts with your kids. One of the most popular Thanksgiving crafts is a pinecone turkey. These cute turkeys are easy to make using supplies you likely already have at home. Keep reading to learn how to create your own pinecone turkey masterpiece!
What You’ll Need
Making a pinecone turkey is a simple kid-friendly craft You’ll need just a few supplies
-
Pinecones – Look for pinecones about 2-3 inches tall You can gather them outside or purchase a bag at a craft store,
-
Paint – Acrylic craft paint works best. You’ll want fall colors like brown, red, orange and yellow.
-
Googly eyes – Large size eyes work best.
-
Pipe cleaners – These will form the legs and neck.
-
Construction paper – For the wattle and beak. Red and orange paper works well.
-
Tacky glue or hot glue gun
-
Paint brush
That’s it! These basic supplies are all you need to create your pinecone turkeys.
How to Make the Turkey Body
Start by painting your pinecone. Mix up fall colors like red, orange, yellow and brown. Paint the tips of the pinecone, covering about 1/2 to 1 inch of the ends. Allow the paint to dry completely.
For the head, take a 4-5 inch piece of an orange pipe cleaner. Roll one end tightly into a spiral coil. This will be the turkey’s head. Once coiled, put a dab of glue on the end to hold the coil in place.
Cut a triangle out of yellow construction paper for the beak. For the wattle, cut a squiggly red shape from construction paper. Glue the wattle to the beak, then glue the beak to the center of the pipe cleaner coil.
Finally, glue on two large googly eyes above the beak to finish the turkey’s head.
Make the Legs and Feet
For the legs, take a 6 inch orange pipe cleaner. Fold it into a “M” shape, making a foot on each end. Bend the feet upwards. Put a dab of glue in the center of the pipe cleaner and attach it to the bottom of the pinecone.
You can also glue or tape colorful feathers onto the back of the pinecone to make a tail if desired.
Attach the Head
Decide where you want to attach the turkey’s head on the pinecone body. Add some glue and stick the head in place.
Let the glue dry completely before displaying your adorable pinecone turkey!
Fun Ways to Display Your Pinecone Turkeys
-
Line them up on your Thanksgiving table or buffet.
-
Cluster them on a tray as a centerpiece.
-
Sit them on the mantel or shelves for seasonal decor.
-
Use them as place cards by writing names on the wings.
-
Give them as Thanksgiving hostess gifts.
-
Attach magnets to the back and put them on the fridge.
-
Use them as napkin rings by slipping rolled napkins through the legs.
Creative Variations
There are all kinds of ways to customize your pinecone turkeys:
-
Use different colored construction paper for creative beaks like blue, green or purple.
-
Glue tiny pom poms or fuzzballs on for feathers.
-
Cut leaf shapes from construction paper for turkey wings.
-
Use wiggly eyes or craft gems instead of googly eyes.
-
Glitter the pinecones before painting for sparkly turkeys.
-
Attach a paper turkey tail with glue or a brad.
-
Cut feathers from felt using pinking shears for a decorative look.
-
Add tiny hats or bow ties for costume turkeys.
Let the kids use their imagination to make each turkey unique! The more creative the better.
Make Thankful Turkeys
For an extra thoughtful craft, have kids write what they are thankful for on the turkey’s feathers. Help them cut out paper feather shapes and write one thing they are grateful for on each feather. Then glue or tape the thankful feathers onto the back of the pinecone. Display these turkeys at your Thanksgiving meal as a reminder of all your blessings.
Fun Craft for Thanksgiving
Crafting pinecone turkeys with kids is a great hands-on Thanksgiving activity. The simple supplies make it budget-friendly too. Follow the easy steps to create these cute turkeys. Then get creative with colors, textures, accessories and more. What will your flock of pinecone turkeys look like? Have fun making these festive crafts to display for the fall season. Gobble gobble!

This festive Thanksgiving turkey craft comes together easily with pinecones and card stock. By
Materials you will need:
- Turkey feather templates (download here)
- Red, yellow, orange, and green cardstock or construction paper
- Scissors
- Ruler
- Hot glue gun with glue
- Medium or large pinecone
How to create your turkey:
1. Use the templates to cut out the shapes needed for the feathers and eyes. Use the photo as a guide or create your own color combinations.
2. Measure and cut out a 2- to 3-inch circle on a piece of cardstock or construction paper (adjust the size of your circle to fit your pinecone as needed). Hot glue the tail feathers onto the circle (not shown). Let dry. Glue the side feathers together. Let dry. Attach all the elements to the pinecone with hot glue. Gobble gobble!
