As an avid turkey hunter, I’m always looking for ways to up my game and be more successful during turkey season. One of the best tools you can have in your vest is a wingbone call Wingbone calls produce soft, authentic turkey sounds that can help draw in wary gobblers They have a unique tone that adds vocal diversity compared to box calls and diaphragms.
Making your own wingbone call is extremely rewarding and a great tradition of turkey hunting. With a few household items and some simple steps, you’ll have your own hand-crafted call that looks and sounds amazing. In this article, I’ll walk through everything you need to know to make a wingbone turkey call from start to finish.
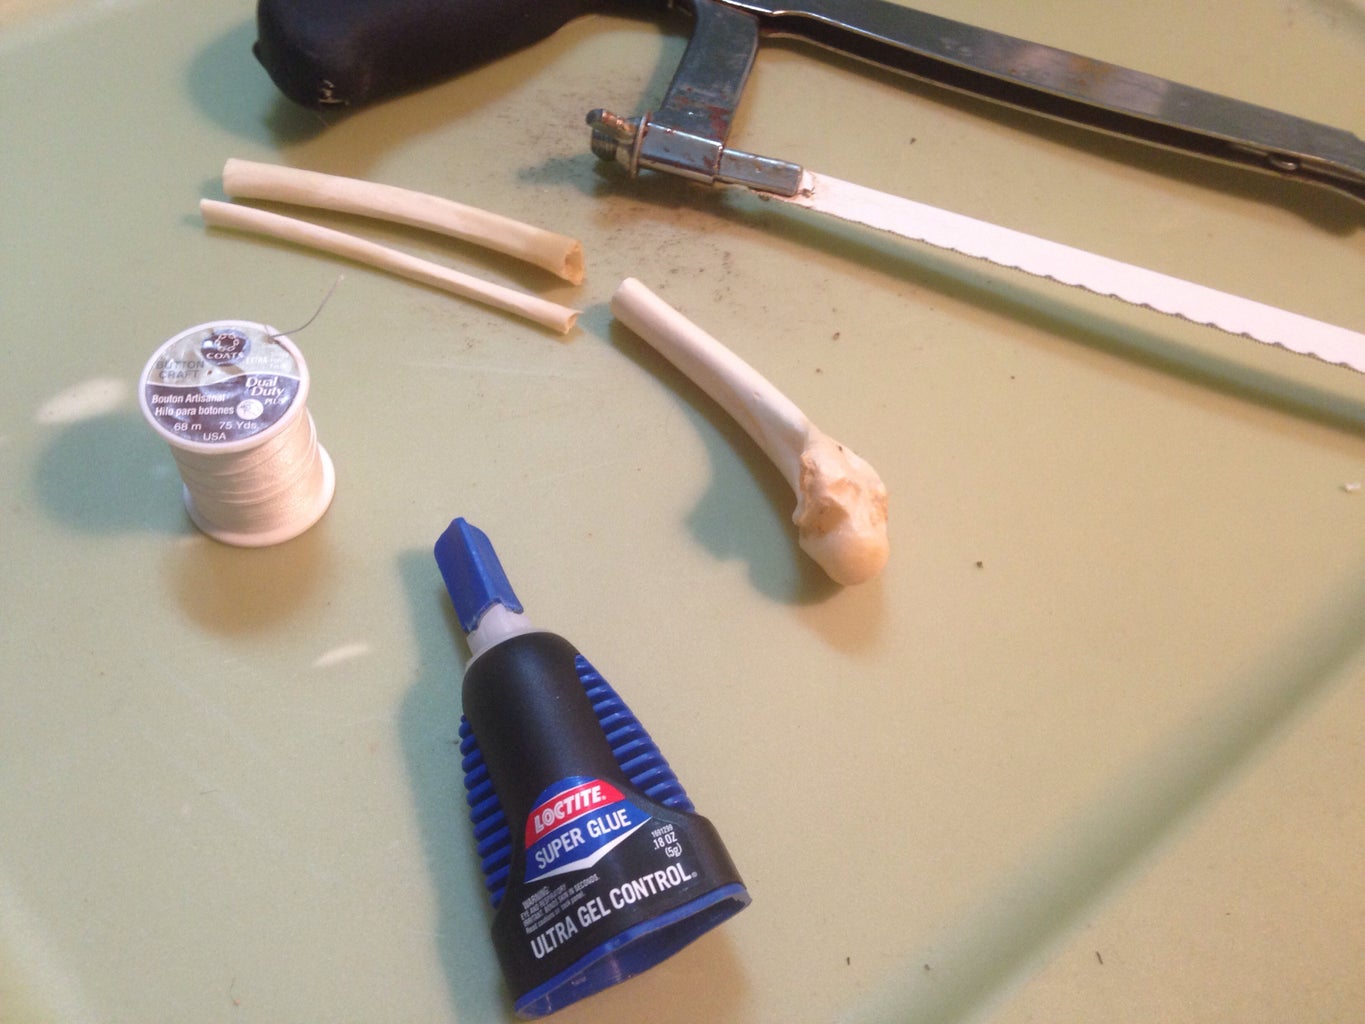
Gather Your Materials
To start, you’ll need to gather a few supplies
- Turkey wing
- Super glue or epoxy
- Sandpaper
- Saw (hack saw or coping saw work well)
- Sanding block
- Rotary tool with sculpting bits (optional)
- String or lace
- Borax or 40 Volume cream peroxide
Remove the Wing Bones
Once you’ve harvested a turkey, start by removing the wing bones. Carefully cut through the joints to remove the wingtip section and the mid-bone. Try to get bones that are around 5-6 inches long. You’ll want to clean off any excess tissue or cartilage with a knife.
Set the bones aside and let them dry out completely. This helps prevent bacteria growth. Some hunters will boil the bones first, but air drying works fine.
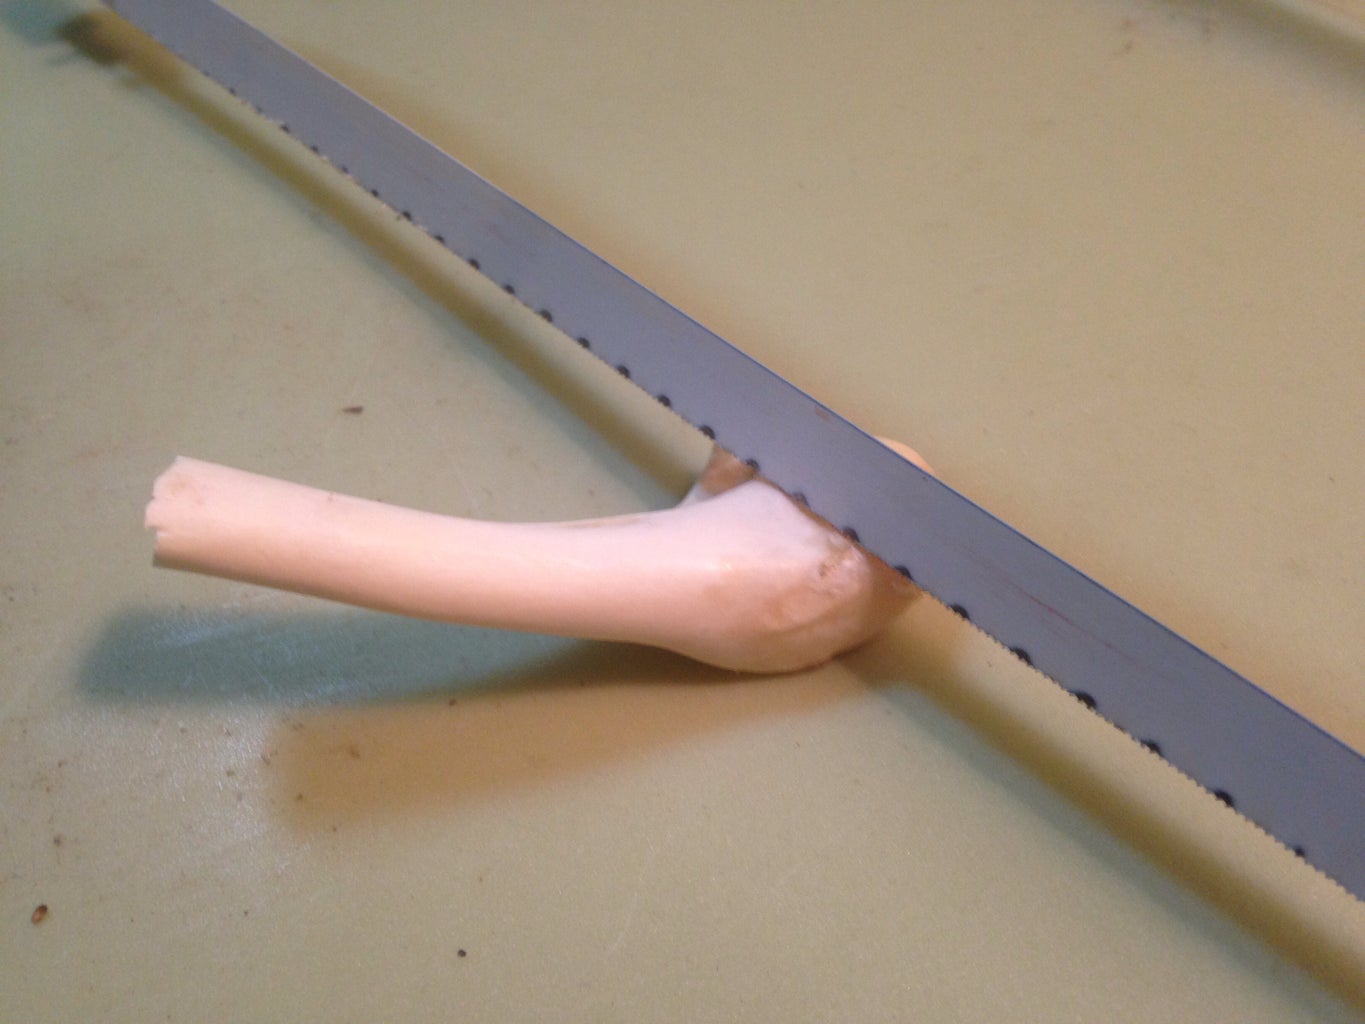
Cut and Shape the Bones
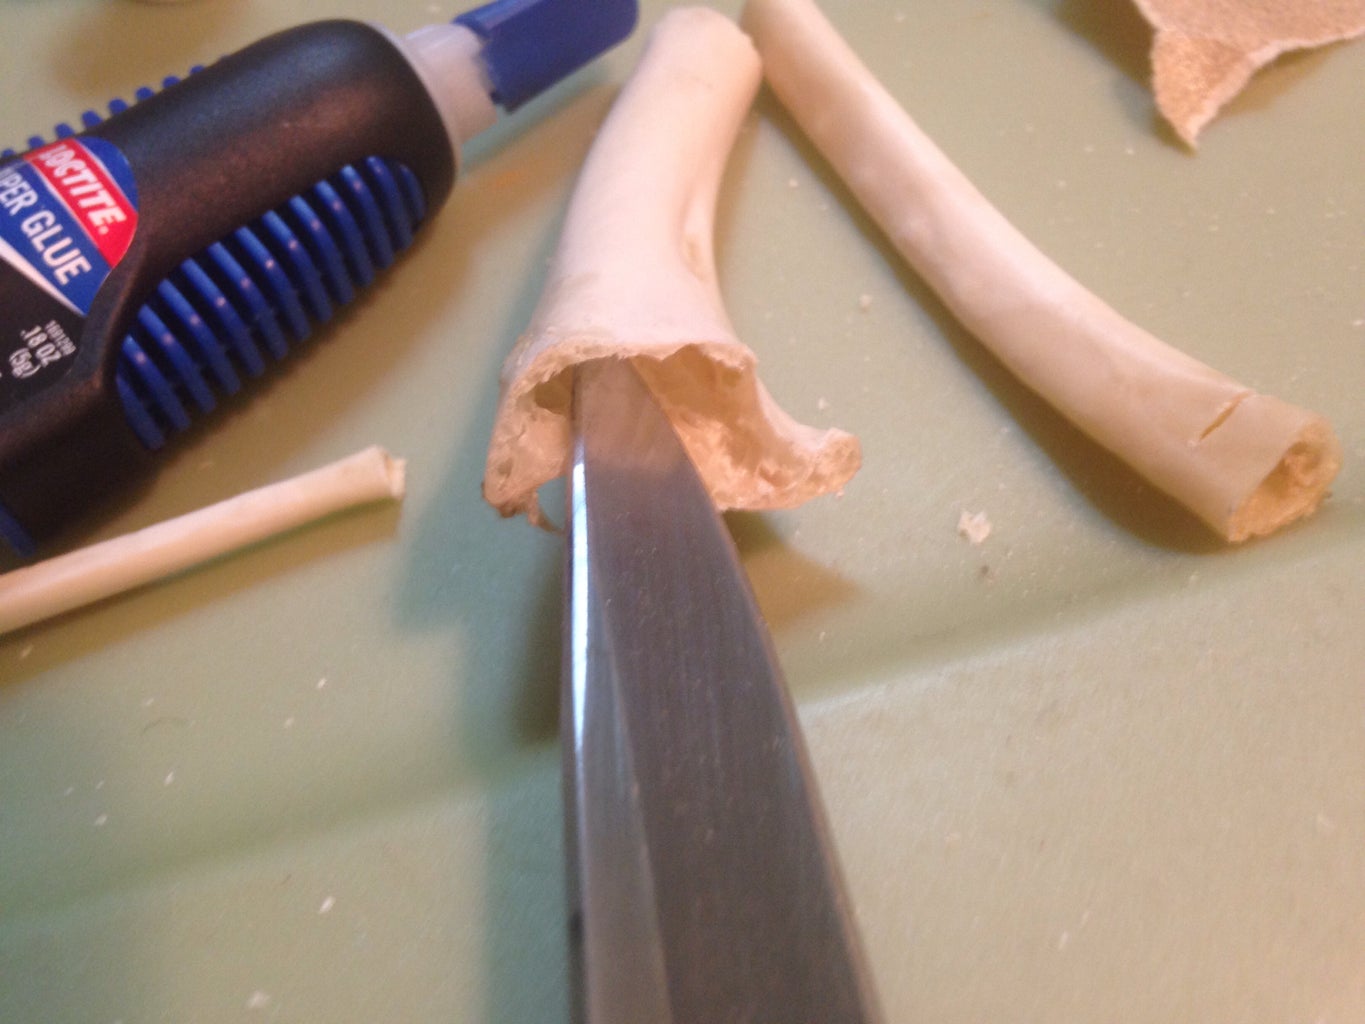
With a saw, cut both ends of the bones so they are flat and even. A straight cut helps ensure an airtight seal when gluing.
Decide which bone will be the sound chamber and which will be the striker. The mid-bone with two joints works perfectly for the chamber. For the striker, pick the straightest section of wingtip.
Use a saw to cut the striker bone an inch or two longer than the chamber. This gives you a handle for grasping it. Sand both pieces smooth with fine-grit sandpaper. I like to round off the edges to get a comfortable, custom fit.
A rotary tool with a sculpting bit can help shape the contours and edges, but sandpaper gets the job done too. Take your time shaping until it feels perfect in your hand.
Whiten and Sterilize the Bones
To get that bright white color, you’ll need to sterilize and whiten the bones. This also kills any bacteria on them.
There are a few options for this step. You can use hydrogen peroxide, bleach, or borax. I prefer borax because it’s cheap and completely safe.
To whiten with borax, mix a tablespoon or two into a pot of hot water until dissolved. Submerge the bones and let them soak for at least half an hour. After soaking, scrub them with an old toothbrush if needed to remove residue.
Once dry, they will be bright white and ready for assembly. Handle them carefully so you don’t stain the bones before gluing.
Glue the Chamber and Striker Together
With the bones cut, shaped, cleaned and dried, you’re ready for final assembly. Use superglue or a two-part epoxy to permanently join the two bones face-to-face. Epoxy provides a stronger bond if you plan on using the call a lot.
Apply a thin layer of glue on the hollow chamber bone. Then press the flat end of the striker bone against it and hold firmly until bonded. Try to line up the bones as straight as possible. Wipe away any excess glue.
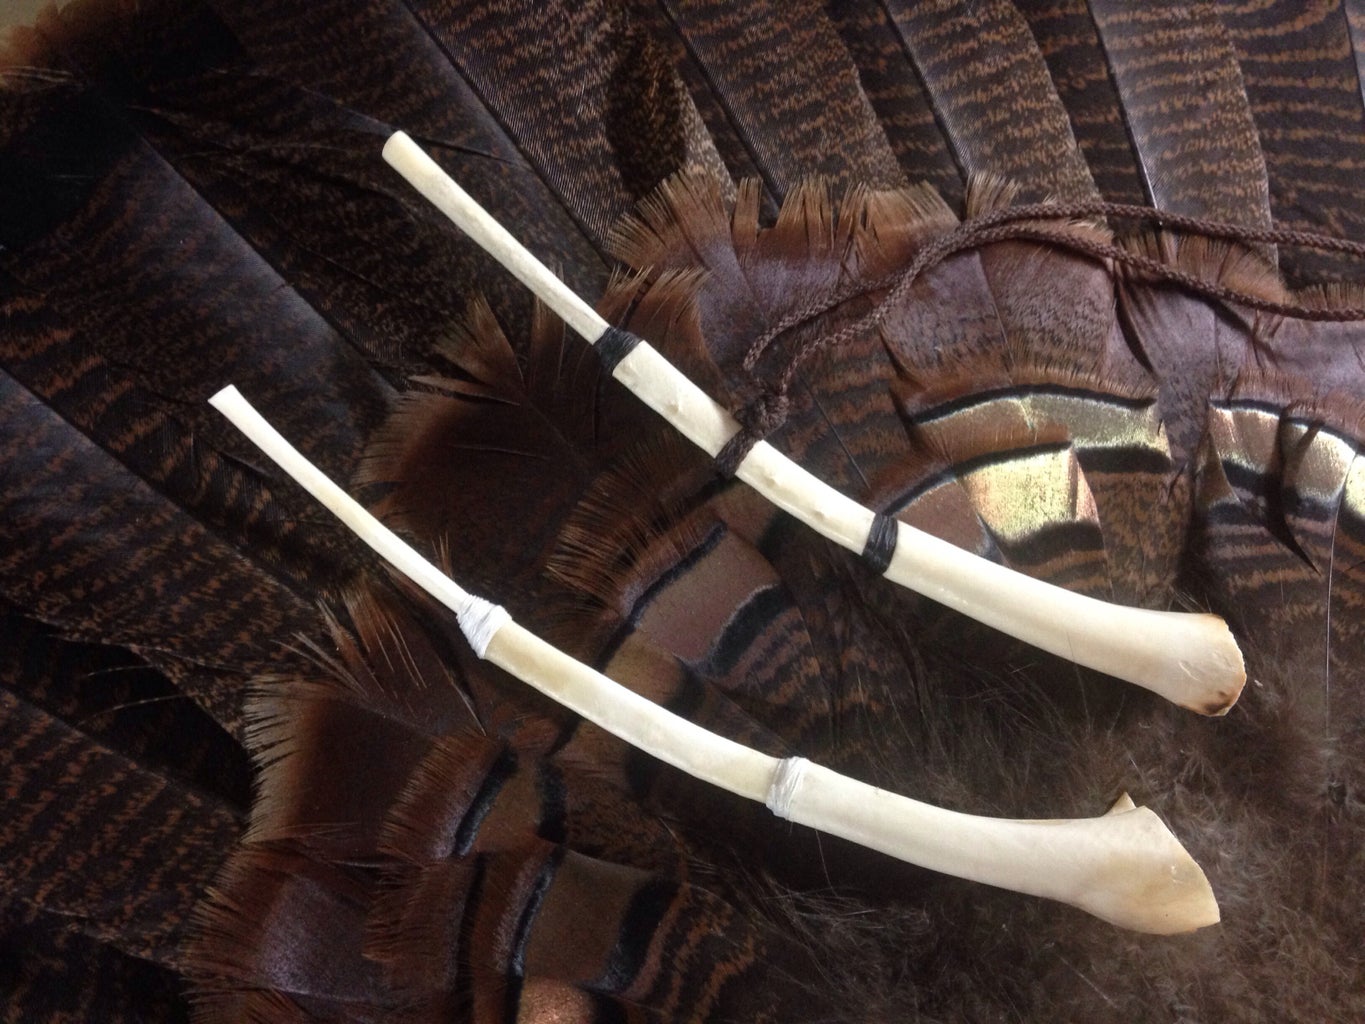
Once the glue dries completely, tie a piece of string or lace around the base of the striker bone. This prevents the two bones from accidentally being separated while using the call.
Try Out Your Creation
The satisfying moment has arrived to take your homemade wingbone call into the turkey woods!
Hold the chamber end to your mouth and lightly drag the striker bone across the other to produce sound. It may take some practice to master, but you’ll soon get the feel for realistic turkey talk.
Start with light strokes across the chamber opening to mimic soft clucks and purrs of a content hen. Press a little harder and increase speed to imitate an excited yelp or assembly call. Your new custom call has amazing tone because YOU made it!
Part of the fun is experimenting with different sounds. The key is varying pressure and speed to mimic turkey language. Use it along with other calls to complement and convergence your vocabulary.
A homemade wingbone call takes time and effort, but it’s incredibly rewarding to harvest a gobbler over one you crafted yourself. Even if you’re new to call-making, follow these simple steps and tips and you’ll be producing beautiful music in no time.
Troubleshooting Your Wingbone Call
Assuming you followed the steps correctly, your wingbone call should sound great with a little practice. But things don’t always go as planned when working with natural materials. Here are some troubleshooting tips if your call has issues:
-
Air leaks – This causes poor sound. Make sure glue fully sealed the chamber. Re-glue if needed and hold firmly until bonded.
-
Bones not fully clean – Debris and tissue can dampen the sound. Re-clean bones with hydrogen peroxide and scrubbing.
-
String too tight – The striker needs room to vibrate. Loosen the string if fitted too tightly.
-
Striker bone too short – Cut another striker and make sure it extends 1-2 inches below the chamber for a handle.
-
Bones misaligned – The striker should lay flat across the chamber. Re-glue if attached crooked.
With attention to detail on each step, you’ll get a perfectly sounding wingbone turkey call that brings gobblers right in! It just takes a little trial and error. Don’t give up if your first attempt has issues.
Expert Tips and Variations
-
Use a slate, glass, or wood surface as the sound chamber for a different effect. Just glue the striker bone to it. Plastic also works.
-
Shape the handle end of the striker into a Cooper’s hawk or owl shape to use as a predator decoy.
-
Stain the bones using coffee, tea, or food coloring for different colors besides white.
-
Use a wingbone from any game bird; they all make workable callers. Goose wingbones are a popular choice.
-
Improve the bond with epoxy by roughing up the bone surfaces first with sandpaper.
-
Add chalky powder like precipitated chalk to the glue to fill any small gaps between the bones.
-
Instead of using borax, try commercial bone whitening products sold by taxidermists.
-
Speed up drying time by placing the bones in a food dehydrator after cleaning.
So there you have it – everything you need to know to make your own wingbone turkey call! With a few simple tools and some patience, you’ll be crafting custom calls that perform like high-end store-bought brands. That first gobble over your homemade creation will be so rewarding. Give it a try this season and outsmart those boss toms!

Step 2: Cut Bones to Length
Introduction: Wingbone Turkey Call