Turkey is easy to can and will last for months on the shelf, so it’s always available when you need a quick meal. Learn how to pressure can turkey with this tutorial.
Around the holidays, turkeys can be purchased at reduced prices from stores and butcher shops. I like to grab an extra bird or two with the purpose of preserving it for later meals. Since freezer space is an issue this time of the year, I can it so it can be stored on the shelf.
Home canned turkey is a convenient option for those days when you need quick meal option. You can use it in chili and soups, tacos, enchiladas, sandwiches, and casseroles.
Canning turkey meat at home is a great way to save money and have delicious healthy meals ready-to-go year round. When you pressure can turkey properly it can last for up to two years in your pantry. Canning turkey yourself allows you to control exactly what goes into your food. You can avoid unwanted ingredients like preservatives, artificial flavors, or extra sodium. Home canned turkey is versatile – use it in sandwiches, casseroles, soups, salads and more!
In this article, I’ll walk you through the simple process of pressure canning turkey step-by-step. You’ll learn everything you need to know to safely preserve turkey meat for your family. Let’s get started!
What You Need to Get Started
Pressure canning requires some special equipment and supplies. Here’s a list of what you’ll need:
-
A pressure canner – This is different from a pressure cooker. A pressure canner allows foods to reach a higher temperature (240°F) needed to kill bacteria for shelf-stable preservation. Look for one that holds 7 quart jars or 9 pint jars.
-
Canning jars – Use pint or quart sized regular mouth mason jars. The jars need to be free of cracks or chips. Always use new lids and rings for canning.
-
Turkey meat – Cooked, raw, ground or chunks of turkey all work well. Make sure the meat is high quality.
-
Broth or water – You’ll need enough liquid to fill your jars leaving 1-1.4 inches of headspace. Chicken or turkey broth adds lots of flavor.
-
Canning tools – Jar lifter, lid lifter, bubble remover, paper towels, canning funnel etc.
-
Time and patience! – Plan to spend 3-4 hours initially as you go through the canning process.
Step-by-Step Guide to Pressure Canning Turkey
Follow these simple steps for safe, successful pressure canned turkey every time!
Step 1 – Prepare the Turkey Meat
-
If starting with raw turkey, boil, roast or simmer the meat until fully cooked. Cook to an internal temperature of 165°F.
-
Allow the cooked meat to cool slightly. Then remove the meat from bones and cut or shred into bite sized pieces.
-
For ground turkey, cook thoroughly until browned and cooked through. Drain excess fat after cooking.
-
Place your cut up turkey pieces or ground turkey crumbles into clean canning jars leaving 1 inch of headspace.
Step 2 – Prepare the Liquid
-
You can use broth, water or a combo for your canning liquid. Chicken or turkey broth adds lots of flavor.
-
If using water, you can add a teaspoon of salt to each quart jar or 1/2 tsp per pint jar.
-
Fill the jars with your hot canning liquid leaving 1-1.4 inches of headspace.
-
Remove any air bubbles by sliding a bubble remover or plastic knife down the sides of the jars. Add more liquid if needed to maintain headspace.
Step 3 – Wipe Jar Rims & Apply Lids/Rings
-
Carefully wipe any food or grease off the top rims of the jars using a damp paper towel. This allows the lids to properly seal.
-
Place the lids on each jar and screw on the rings just until fingertip tight – do not overtighten.
Step 4 – Load Canner & Bring to Pressure
-
Place jar rack inside the canner and fill canner with 2-3 inches of hot water.
-
Use jar lifter to carefully load sealed jars onto rack in canner. Jars should not touch each other.
-
Check that the canner vent pipe is clear and place lid on canner. Do not lock the lid down yet.
-
Over high heat, allow steam to vent vigorously from the open vent pipe for 10 minutes.
-
After 10 mins of venting, close the vent pipe to pressurize the canner. Look for the pressure indicator to pop up.
Step 5 – Process Jars Under Pressure
-
Once the canner reaches your target pressure, start a timer for the full processing time.
- For pint jars, process at 11 PSI for 75 minutes
- For quart jars, process at 11 PSI for 90 minutes
-
Regulate the stove heat to maintain steady pressure for the entire processing time.
Step 6 – Turn Off Heat & Allow Pressure to Drop Naturally
-
When timer goes off, turn off heat.
-
Allow canner to cool and lose pressure naturally. This takes 30-60 minutes typically.
-
Do not try to rush the pressure release or cooling process! This can lead to unsafe vacuum seals.
-
When the pressure indicator drops, carefully remove lid tilting it away from you.
Step 7 – Remove & Check Seals
-
Using your jar lifter, remove jars from canner and place on a towel or cutting board.
-
Leave space between the jars for air flow.
-
After 12-24 hours, check seals on cooled jars by pressing gently on the center of each lid. It should not flex up and down at all.
-
Remove rings. Wash jars and lids. Label with contents and date. Check again before use for any broken seals or spoilage.
Helpful Tips for Success
Here are some additional tips to guarantee picture perfect canned turkey:
-
Use fresh, high quality turkey meat – avoid pre-frozen or deli turkey.
-
Trim excess fat from meat before canning to prevent the fat from turning rancid.
-
Make sure your pressure canner is in good working order and gauge is recently calibrated.
-
Carefully follow the validated pressure canning times listed above – do not take shortcuts.
-
Allow canner to fully vent for 10 minutes before closing vent pipe.
-
After processing, let canner fully depressurize naturally – do not rush the cooling process!
-
Make sure lids seal properly before storing – reprocess any unsealed jars.
What to Do With Your Canned Turkey
Now comes the best part – enjoying your delicious home canned turkey! Here are some ideas:
-
Quick turkey salad or sandwich – drained turkey, mayo, celery, pickles, onions etc.
-
Turkey pot pie – combine with vegetables and biscuit topping.
-
Turkey casserole – mix with rice, cheese, creamy soup, veggies etc.
-
Turkey soup – add canned turkey plus veggies, noodles or rice.
-
Turkey tetrazzini – turkey, spaghetti, parmesan, sherry, mushrooms etc.
-
Turkey enchiladas – stuffed in tortillas with beans, cheese, sauce.
-
Turkey hash – turkey, potatoes, onions, peppers, spices.
As you can see, the possibilities are endless! Home canned turkey is so versatile. You’ll love having it ready-to-go in your pantry.
Frequently Asked Questions
If you’re new to home canning, chances are you have some questions. Here are answers to some common FAQs about pressure canning turkey:
Why do I need to use a pressure canner instead of a water bath canner?
Turkey is a low-acid meat so it requires the high heat of a pressure canner to destroy botulism-causing bacteria. Water bath canning does not get hot enough. Using a pressure canner ensures safety.
How long does properly canned turkey last in storage?
If canned correctly, sealed turkey jars stored in a cool, dry place should keep for up to 2 years. Always inspect jars before use and never consume turkey from a jar with an unsealed lid or any sign of spoilage.
Can I adjust the processing time or pressure?
No, you should always follow the validated pressure canning instructions above for your specific jar size. Increasing or decreasing time or pressure can lead to unsafe food.
What causes siphoning or seepage from jars during processing?
This is caused by improper headspace. Be sure to leave 1-1.4 inches of headspace when filling jars. Add more liquid before canning if needed. Wipe rims thoroughly and check your processing time and pressure.
My turkey floated to the top during processing – is it safe?
Yes, this is normal! Turkey is less dense than the canning liquid so it tends to float. As long as jars were processed properly with correct headspace, the floating turkey is perfectly safe.

Step 4: Can the Turkey Meat
Lay a kitchen towel on the counter. Use the jar lifter to remove a jar from the canner. Pour out the water (save it for washing dishes), and place the jar on the towel. Keep the remaining jars in the canner, so they stay hot.
Hot pack the jar with loosely with hot meat. Don’t pack tightly, but do use the bubble popper to push down the pieces to eliminate large pockets.
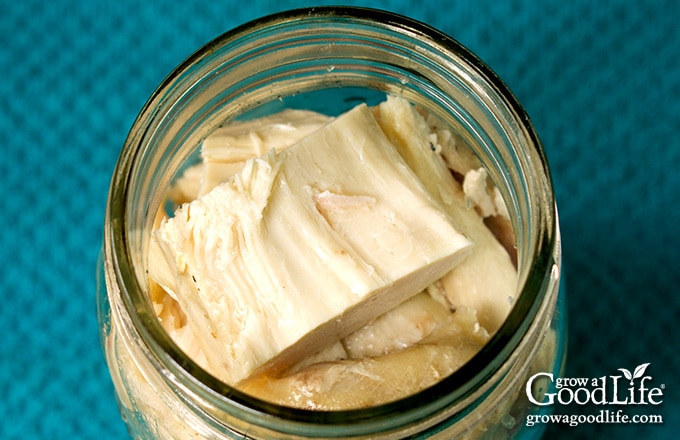
Place the canning funnel on the jar, use the ladle, and cover the meat with stock while maintaining a 1-inch headspace. Run the bubble popper through the jar to release trapped air bubbles.
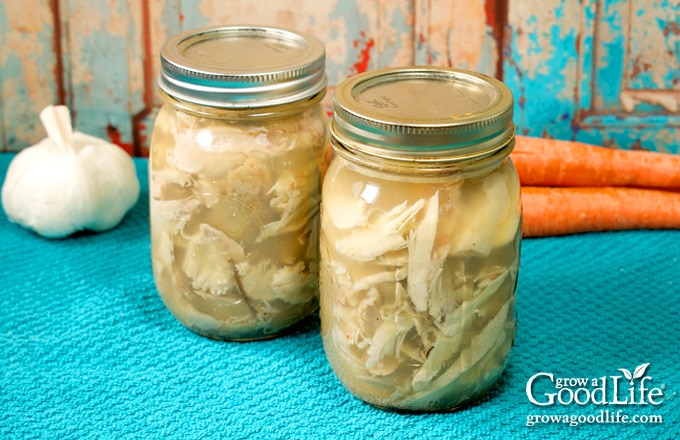
Wipe the rim of the jar with a damp towel to remove any residue. Center a lid on the jar, place the band over the lid, and screw it on until fingertip tight. Immediately place the jar back into the canner, and repeat with the rest of the jars.
Bring the canner to a boil over medium-high heat. Follow the directions for your pressure canner and process the jars for the times indicated in the recipe below.
When the processing time is complete, turn off the heat and let the canner cool naturally, remove the jars, and let them cool completely. Date, label, and store in a cool location for 12 to 18 months.
Step 2: Prepare the Canning Equipment
When you are ready to can the turkey, gather your canning gear, prepare the jars, set up the pressure canner, and organize your work area.
You will need:
Wash the canning jars, lids, bands, and canning tools in hot soapy water, and rinse well. Set the lids and bands aside to air dry until you are ready to use them.
Place the pressure canner on the stove, and insert the canning rack. Fill the canner with water according to the manufacturer’s instructions: Presto is 3 quarts, Mirro is 2 quarts, and All American is 2 to 3 inches.
Fill the jars halfway with hot water, and then place them in the canner. Bring the canner to a simmer for 10 minutes (180˚F). Don’t boil, but keep hot until you are ready to fill them.