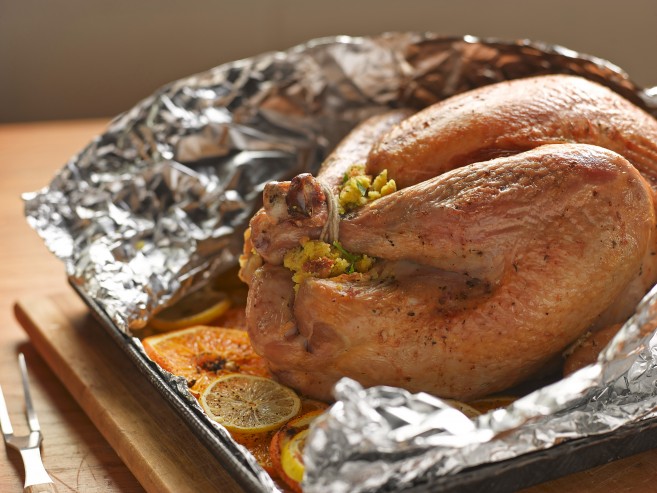
A miraculous technique for roasting turkey using aluminum foil smeared with butter to protect the breast from intense heat, while basting it. The foil is removed at the end so that the skin can crisp up. This article also has information about brining, and whether you should do it, as well as tons of tips for perfectly roasted turkey.
You probably know that my parents owned and operated restaurants when I was growing up. What you might not know is that they also did a lot of catering. We estimate that they’ve catered over a thousand turkey dinners, with each dinner requiring numerous turkeys. Their dinners have always had rave reviews, and now, I’m explaining to you my mom’s technique for perfect roasted turkey. First we’ll talk about the size of the turkey that you need, then we’ll get into the cooking technique (it involves basting and crisping the skin with butter!) that gets you perfectly cooked, juicy meat – even the breast meat is juicy!
As a general rule, 1 and 1/2 pounds of bone-in turkey will feed one person and provide leftovers. If you are not a leftover family, 1 pound of bone-in turkey will be your mathematical formula. If you will be having a lot of side dishes, you can go with even less, around 3/4 of a pound. This is especially true if you’ll be having appetizers and munchies set out before dinner, and dessert afterwards.
When it comes to choosing your turkey, The Kitchn has a wonderful resource that addresses budget, fresh vs. frozen, and how to identify the different types of turkeys and how they are raised. I will say though, that my parents were buying turkeys in bulk for dinners and weren’t getting anything fancy. So, if you just go into your grocery store and buy one of the turkeys there, you’ll be just fine. With the method below, nothing fancy is required!
Cooking the perfect turkey can be intimidating, especially on important holidays like Thanksgiving. Many home cooks struggle with drying out the turkey or undercooking it. However, there is a simple trick that guarantees moist, flavorful turkey every time – wrapping it in foil. In this comprehensive guide, we will cover everything you need to know about cooking turkey wrapped in foil.
Benefits of Cooking Turkey in Foil
Wrapping your turkey in foil offers several advantages over cooking it uncovered
-
Prevents Drying Out – Foil creates a protective barrier that seals in moisture as the turkey cooks This keeps the meat deliciously juicy,
-
Enhances Flavor – The juices can’t escape from the foil, so they get reabsorbed into the meat, enhancing the flavor.
-
Cooks Evenly – Foil helps the turkey cook nice and evenly, preventing hot and cold spots
-
Saves Time – Foil retains heat better than air, so your turkey will cook faster.
-
Easier Cleanup – With all the juices trapped inside, there’s minimal mess to clean up.
Choosing the Right Foil
Not all foil is created equal when it comes to cooking turkey. Here’s what to look for:
-
Heavy Duty – You need foil that is sturdy enough to withstand high oven temperatures without tearing. Look for heavy duty or extra heavy duty.
-
Non-Stick – Non-stick foil will prevent the turkey from sticking as it cooks. This makes removing it easier.
-
Aluminum – Aluminum foil conducts heat more evenly than other metals. This helps the turkey cook through.
Many chefs recommend Reynolds Wrap Heavy Duty Foil because it meets all the above criteria.
Preparing the Turkey
Proper prep is key to flavorful roasted turkey:
-
Thaw – Make sure turkey is completely thawed before cooking. Keep it in the fridge 1 day for every 4 lbs.
-
Dry Skin – Pat the turkey dry with paper towels. Moisture prevents the skin from crisping.
-
Coat in Oil – Rub the skin all over with oil or butter. This helps crisp the skin.
-
Season Well – Get flavor into every nook and cranny with salt, pepper, sage, thyme, rosemary, etc.
-
Stuff Lightly – Overstuffing prevents heat from penetrating into the cavity. Keep it light.
With the prep work done, it’s time to wrap in foil.
How to Wrap a Turkey in Foil
Wrapping a turkey for roasting is simple:
-
Preheat oven to 350°F. Place turkey breast-side up on a rack in a roasting pan.
-
Tear off a sheet of heavy duty foil about 2 1⁄2 times longer than the turkey.
-
Lay the foil over the breast and tuck it loosely around the body, leaving space for air circulation.
-
Crimp the edges but don’t wrap too tightly. You don’t want to compress the meat.
-
Make sure the drumsticks and wings aren’t restricted. They should have foil-free range of motion.
-
Pour 1 cup chicken broth in the bottom of the pan to keep the turkey moist.
-
Insert a meat thermometer deep into the thickest part of the thigh, not touching bone.
The turkey is ready for the oven!
Cooking Times
Cooking times will vary based on the weight of your turkey. Here are general guidelines:
- 8 – 12 lbs = 2.5 – 3 hours
- 12 – 14 lbs = 3 – 3.5 hours
- 14 – 18 lbs = 3.5 – 4 hours
- 18 – 20 lbs = 4 – 4.5 hours
- 20 – 24 lbs = 4.5 – 5 hours
For stuffed turkeys, add 30 minutes to the time. Your thermometer should register 165°F when done. If browning the skin, remove foil 30 minutes before finishing.
Adding Flavor
There are easy ways to infuse more flavor into foil-wrapped turkey:
-
Compound Butter – Slathering the turkey with a compound butter made with herbs and citrus zest adds tons of flavor.
-
Aromatics – Stuff the cavity with quartered lemons, onions, garlic, and fresh herbs.
-
Brining – Soaking the turkey overnight in a saltwater brine infuses it with moisture and seasoning.
-
Injecting – Injecting a saltwater brine deep into the meat makes it super juicy and flavorful.
-
Spice Rub – Rubbing the skin with spices, brown sugar, and citrus zest gives great crispy, caramelized flavors.
Carving Made Easy
Follow these steps for easy, flawless carving:
-
Let turkey rest at least 20 minutes before carving. This allows juices to redistribute.
-
Carve turkey where it sits. No need to transfer it.
-
Start by removing the legs and thighs. Cut where they meet the body.
-
Slice the breast meat by making thin, even cuts at an angle against the grain.
-
Keep sliced meat warm and moist in foil as you carve the rest of the turkey.
With these tips, you’ll have moist, flavorful and perfectly cooked turkey wrapped in foil for your next Thanksgiving or holiday meal. Give it a try and enjoy!
Frequently Asked Questions
Should I baste my foil-wrapped turkey?
Basting is not necessary since the foil seals in moisture. Opening the foil to baste causes moisture loss.
Can I stuff my turkey wrapped in foil?
Lightly stuffing is fine but overstuffing prevents heat from properly penetrating. Keep stuffing loose and limited.
What temperature should I cook the turkey to?
Cook until the thigh meat registers 165°F on a meat thermometer for safe doneness.
How can I crispen up the skin with foil on?
Remove foil 30 mins before done and increase oven temp to 400°F to crisp the skin.
Is it ok to cook the turkey directly in foil?
It’s best to use a rack inside a pan to allow air circulation under the turkey. Tent foil over top.
What if my turkey is too big for one foil sheet?
Use multiple sheets to fully wrap large turkeys. Overlap by several inches to seal moisture.
Can I prep the turkey a day before cooking?
Yes, you can wrap the seasoned turkey in foil a day ahead. Refrigerate until ready to roast.
What temperature should I reheat leftovers to?
Reheat roasted turkey leftovers to an internal temperature of 165°F. Slice or shred meat to heat faster.
Can I use cooking bags instead of foil?
Yes, oven-safe cooking bags work well. Follow the same temperature and time guidelines.
Wrapping turkey in foil is a surefire way to get deliciously moist, flavorful results every time. Follow this guide for your best foil-wrapped turkey yet!
Step #3: Season And Butter The Turkey
Next you’ll be seasoning liberally with salt and pepper, all over. But, there’s no seasoning in the below picture because this turkey was brined. If you have brined your turkey, don’t add anything to it here.
Brined or not, what you’re going to do is to take a big piece of aluminum foil. You’ll want a piece bigger than in the below picture. Let me explain. When I was taking these pictures, I misremembered how my mom did it and thought she only covered the breast meat with foil. She has since told me that I was wrong. So, get a piece of foil big enough to cover the entire bird, two overlapping pieces is fine if needed. Then smear one side of the foil with a lot of softened butter or margarine. You want a good cup (that’s two sticks) of butter spread on there.
Note, I think it’s best to use unsalted butter, especially if you’ve brined the turkey. Or just keep in mind that there’s salt in your butter when you’re seasoning the turkey. If you want to take this whole butter thing to another level, you can add flavors to the butter before putting it onto the foil. This is my recipe for Compound Butter for Turkey. It can be used on the foil before roasting, or you can dot fully-cooked sliced turkey with little bits of it to add buttery flavor at the end.
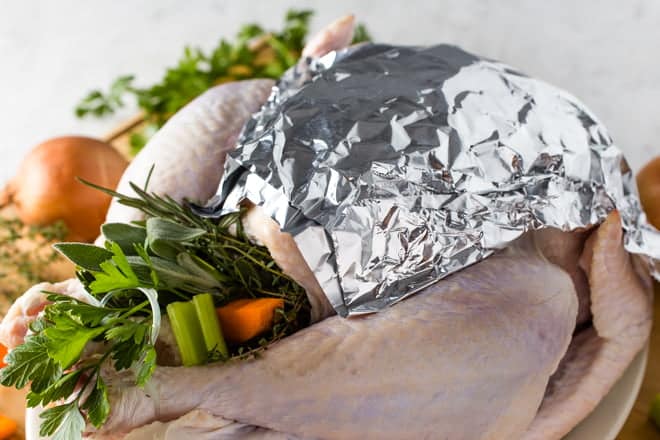
Then, take that foil and put it butter side down onto the turkey. Press the foil against the turkey skin so that it’s making contact all over. This foil is going to protect the breast meat from drying out, and is also going to keep delicious butter against the turkey for a lot of the cooking process. It’s also going to drip down into the roasting pan giving you delicious basting juices, and delicious drippings for your gravy.
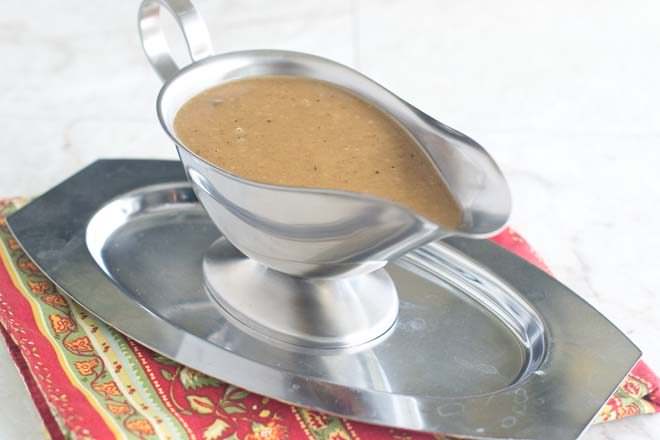
STEP #5: Make Gravy
You’re going to want to transfer the turkey out of the pan and to another container so that you can access the drippings that are in the roasting pan. These are liquid gold when it comes to making gravy. I’m not going to get into all the how-to’s of making gravy here, but just a few things.
First, no matter what, you need to separate the fat off of the drippings. I like to use a gravy separator for that. Or you can just let them rise to the top and then spoon them off.
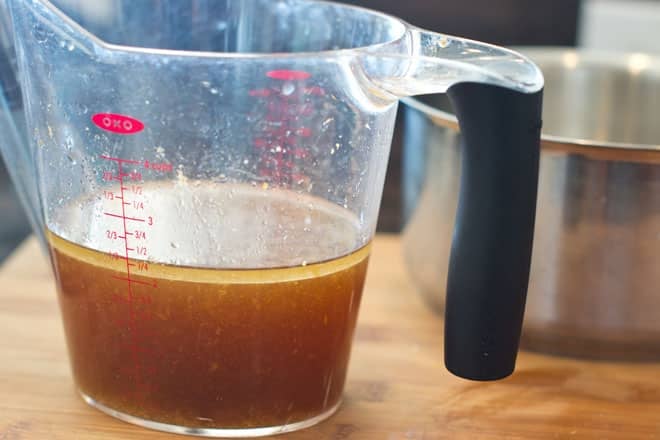
Next, if you brined your turkey (wet or dry) your drippings might be salty. When I brine poultry, I typically do this technique of making gravy without drippings (which can actually be done ahead of time!), but I don’t add any salt. Then, once my turkey is done, I taste the drippings and use their saltiness as seasoning.
If you haven’t done the make-ahead gravy without drippings though, don’t worry. This gravy tutorial really explains how to test your drippings and how to make use of them even if they’re too salty, so you can do that instead.
I’m also going to link to my cornstarch gravy here for you. If you have any people coming to your dinner who eat gluten-free, make this for everyone (but use your de-fatted turkey drippings in place of the broth). Another interesting thing to do is to make vegan gravy. If you have any vegetarians coming who are planning to make a meal out of sides, you can offer them this to put on their potatoes and stuffing. You can even make up the vegan gravy, divide it in half, and then add your turkey drippings to only one half of it.