A miraculous technique for roasting turkey using aluminum foil smeared with butter to protect the breast from intense heat, while basting it. The foil is removed at the end so that the skin can crisp up. This article also has information about brining, and whether you should do it, as well as tons of tips for perfectly roasted turkey.
You probably know that my parents owned and operated restaurants when I was growing up. What you might not know is that they also did a lot of catering. We estimate that they’ve catered over a thousand turkey dinners, with each dinner requiring numerous turkeys. Their dinners have always had rave reviews, and now, I’m explaining to you my mom’s technique for perfect roasted turkey. First we’ll talk about the size of the turkey that you need, then we’ll get into the cooking technique (it involves basting and crisping the skin with butter!) that gets you perfectly cooked, juicy meat – even the breast meat is juicy!
As a general rule, 1 and 1/2 pounds of bone-in turkey will feed one person and provide leftovers. If you are not a leftover family, 1 pound of bone-in turkey will be your mathematical formula. If you will be having a lot of side dishes, you can go with even less, around 3/4 of a pound. This is especially true if you’ll be having appetizers and munchies set out before dinner, and dessert afterwards.
When it comes to choosing your turkey, The Kitchn has a wonderful resource that addresses budget, fresh vs. frozen, and how to identify the different types of turkeys and how they are raised. I will say though, that my parents were buying turkeys in bulk for dinners and weren’t getting anything fancy. So, if you just go into your grocery store and buy one of the turkeys there, you’ll be just fine. With the method below, nothing fancy is required!
Wrapping your turkey in foil is a time-tested technique that helps ensure a juicy, flavorful bird with crispy skin every time. As a holiday cooking staple passed down for generations, this method seals in moisture and juices using an aluminum foil shield. If you’re new to cooking turkey or looking to up your game this year, read on for a complete guide to foil-wrapping success.
Benefits of Foil-Wrapping Your Turkey
There are several key benefits to cooking your turkey encased in foil
-
Prevents Drying Out Foil creates a protective barrier between the turkey skin and hot oven air This keeps the turkey moist and prevents it from drying out
-
Self-Basting: As the turkey cooks, juices collect inside the foil pouch. This essentially causes the turkey to baste itself, ensuring incredibly tender and juicy meat.
-
Speeds Cook Time Foil helps insulate the turkey, allowing it to cook faster than roasting uncovered You can shave off up to an hour of cook time
-
Easy Cleanup: Once finished cooking, just toss the foil and you have no roasting pan to scrub!
Turkey Foil-Wrapping Essentials
Below are some turkey foil-wrapping tips and essentials:
-
Heavy-duty foil: Select a heavy-duty or extra-thick foil that won’t rip while handling the wrapped turkey. Reynolds and other brands make foil specifically for this purpose.
-
Adequate size: Plan for foil that’s about 2 1/2 times longer than your turkey. This allows for ample overlap when sealing the foil around the bird.
-
Roasting pan: Choose a roasting pan a few inches larger all around than your turkey. Nonstick is ideal as drippings won’t stick and clean-up is easy.
-
Poultry shears: Invest in a good pair of poultry shears. These make quick work of cutting through backbone and breastbones when carving.
-
Meat thermometer: A reliable meat thermometer is a must to check doneness and ensure food safety. Insert into the thickest part of the thigh but not touching bone.
-
Turkey lifters: Sturdy turkey lifters help easily maneuver the cooked bird in and out of the oven. Forks tend to pierce the skin.
Step-by-Step Guide to Foil-Wrapping a Turkey
Follow these simple steps for foil-wrapping success:
1. Prep the Turkey
-
Remove giblets and neck from turkey cavities. Rinse turkey inside and out; pat dry with paper towels.
-
Tip: For even cooking, let turkey stand at room temperature 30-60 minutes before cooking.
2. Prepare Foil
-
Place roasting pan on counter. Tear off sheet of heavy-duty foil about 2 1/2 times longer than turkey.
-
Set turkey breast-side up in center of foil. Foil should extend well beyond edges of turkey.
3. Wrap Turkey Tightly
-
Bring foil up over breast and legs. Wrap tightly around drumsticks to seal in juices.
-
Fold over ends of foil to seal. Foil should wrap turkey snugly but allow a little room for heat circulation.
4. Roast Turkey
-
Place wrapped turkey breast-side up in preheated 450°F oven.
-
Roast until thermometer inserted in thickest part of thigh reads 180°F, about 3 hours for a 12-14 lb turkey.
-
For crispier skin, unwrap and roast 10-15 minutes more at end.
5. Rest, Carve and Serve
-
Remove turkey from oven, loosely tent with foil and let rest 15-20 minutes before carving. This allows juices to redistribute.
-
Carve turkey and arrange on platter. Pour drippings from foil into fat separator for gravy.
-
Serve turkey drizzled with gravy and enjoy! Refrigerate leftovers within 2 hours.
Turkey Foil-Wrapping Tips and Tricks
-
For a turkey injected with broth solution, roast at 400°F to prevent overcooking.
-
Add sliced onions, carrots and celery inside cavity while roasting for extra flavor.
-
Rub skin with softened butter or oil before wrapping for crisper skin.
-
Use v-rack in roasting pan to elevate turkey for even cooking. Tent foil over v-rack.
-
Make foil tent higher to allow more air circulation and prevent steaming.
-
Add 1⁄2 cup broth or wine to bottom of roasting pan for extra moisture.
-
Use thermometer probe designed for roasting so you can monitor temp without unwrapping.
-
Let roasted turkey rest 30 minutes before carving for largest, juiciest slices.
Common Foil-Wrapped Turkey Problems and Solutions
Problem: Turkey skin isn’t browning or crisping.
Solution: Unwrap turkey and return to oven about 30 minutes before finish to brown skin.
Problem: Turkey is cooking too slowly or not brown enough.
Solution: Be sure foil is wrapped snugly. Oven temp may be too low; increase 25 degrees.
Problem: Turkey is drying out.
Solution: Use heavy duty foil and wrap tightly with no steam vents. Baste with broth if unwrapped at end.
Problem: Turkey is not fully cooked and thermometer doesn’t reach 180°F.
Solution: Return to oven and continue roasting, checking temperature every 15 minutes until done.
Frequently Asked Questions
Should you bake stuffing inside a foil-wrapped turkey?
No, it’s not recommended. Stuffing cooks slower than the turkey which can lead to food safety issues. Cook stuffing separately to remove when turkey reaches optimal doneness.
Can I use an oven cooking bag instead of foil?
Yes, oven cooking bags work well and provide similar benefits to foil. Be sure to use a bag designed specifically for turkeys.
How long should I let a foil-wrapped turkey rest before carving?
Let it rest 15-20 minutes on the counter loosely tented in foil. The resting period allows juices to redistribute for better texture.
What’s the best way to reheat foil-wrapped turkey leftovers?
Slice turkey pieces and place on a sheet pan or casserole dish. Cover with foil and reheat at 325°F until warmed through, about 30 minutes.
The Takeaway
Foil-wrapping is a no-fuss, no-muss method that guarantees you a succulent roast turkey with crackly crisp skin every time. With these tips, you can master this time-saving holiday cooking technique. Once you enjoy juicy, flavorful turkey from this easy method, you may never roast a turkey uncovered again!
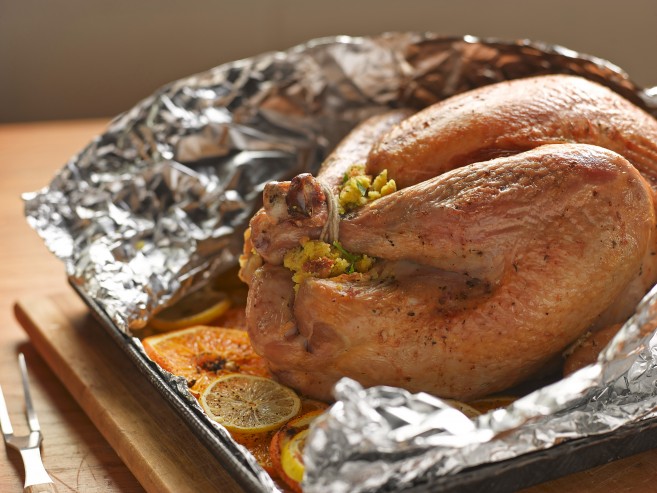
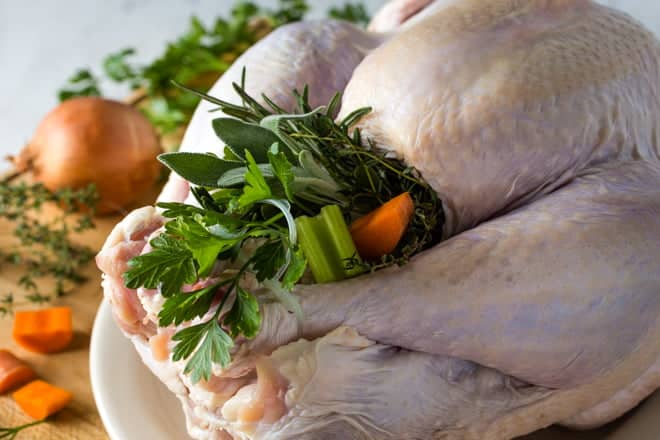
STEP #2 – Stuff The Cavity With Aromatics
Don’t stuff the turkey with stuffing or dressing. I know that to some people this may seem sacrilegious. I understand. But really, don’t stuff the turkey. That makes it take longer to cook, which means drier turkey, and it’s been found to lead to more issues with bacteria too. Instead, you’ve got to try my mom’s stuffing recipe. She bakes it in muffin tins and the portions look adorable, and the recipe is classic and delicious, soft inside with a bit of crispness on top.
Instead of filling the turkey with stuffing or dressing, you can put some aromatics in there. I honestly don’t think it’s necessary, especially if you’ve used that ultra-flavorful wet brine or the dry brine I told you about above. But if you really want to, you can. Fresh herbs, carrots, onion, celery, orange wedges, lemon wedges, and garlic cloves all work well. You don’t need very much though. It should be really loosely tucked into there. I think for this picture, I had too much. You also don’t really want it sticking out like that. I did that to make the picture look pretty, I think. But, it’s better to have it all tucked in.
STEP #5: Make Gravy
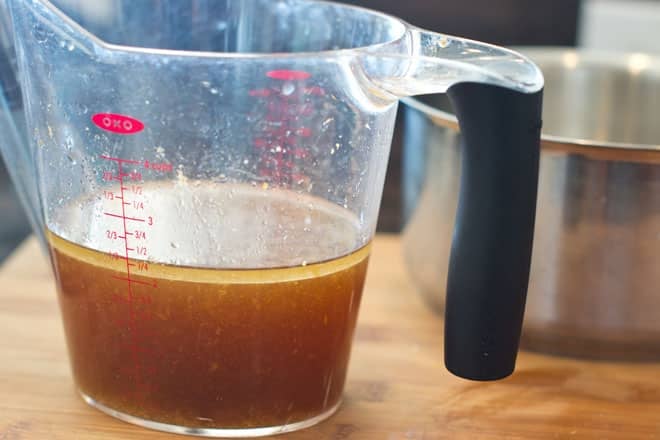
You’re going to want to transfer the turkey out of the pan and to another container so that you can access the drippings that are in the roasting pan. These are liquid gold when it comes to making gravy. I’m not going to get into all the how-to’s of making gravy here, but just a few things.
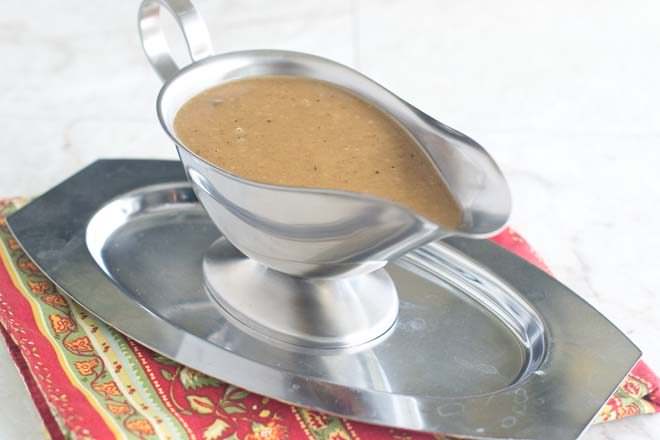
First, no matter what, you need to separate the fat off of the drippings. I like to use a gravy separator for that. Or you can just let them rise to the top and then spoon them off.
Next, if you brined your turkey (wet or dry) your drippings might be salty. When I brine poultry, I typically do this technique of making gravy without drippings (which can actually be done ahead of time!), but I don’t add any salt. Then, once my turkey is done, I taste the drippings and use their saltiness as seasoning.
If you haven’t done the make-ahead gravy without drippings though, don’t worry. This gravy tutorial really explains how to test your drippings and how to make use of them even if they’re too salty, so you can do that instead.
I’m also going to link to my cornstarch gravy here for you. If you have any people coming to your dinner who eat gluten-free, make this for everyone (but use your de-fatted turkey drippings in place of the broth). Another interesting thing to do is to make vegan gravy. If you have any vegetarians coming who are planning to make a meal out of sides, you can offer them this to put on their potatoes and stuffing. You can even make up the vegan gravy, divide it in half, and then add your turkey drippings to only one half of it.