Ditch the junk in the jar, or the powdered packets, and learn how to make gravy from turkey drippings with this easy recipe. Once you’ve made the real deal, you will never go back to sub-par Thanksgiving day gravy again. Plus, once you learn how to make a gravy, you can apply the same principles to every other type of gravy you want to make. Seriously, it is so simple!
I can remember the first Thanksgiving I ever hosted and honestly, the gravy was the one item that intimidated me the most. I don’t know why, but it seemed so mysterious of how I was supposed to take the juices from the bottom of my roaster and turn it into a gorgeous, smooth gravy.
Simply, the drippings from your turkey are all the juices and fat that left behind in the bottom of your roasting pan after your turkey has completely finished roasting. They are the reason your gravy will taste amazing because they came directly from the turkey itself. No broth or mix can ever taste better than these fresh drippins.
Turkey drippings are a delicious and flavorful addition to any holiday meal but they can also be quite fatty. If you’re looking to reduce the fat content of your turkey drippings, there are a few simple methods you can use. In this article I’ll explain the benefits of separating fat from turkey drippings and walk you through some easy techniques to do it, whether or not you have specialty kitchen tools.
Why Separate Fat from Turkey Drippings?
When your turkey is roasting in the oven, all those lovely juices mix together with the melting fat to create what we call turkey drippings. These drippings have incredible flavor from the turkey itself, the herbs and spices used to season it, and the caramelized bits stuck to the bottom of the pan.
While delicious, these drippings can also be high in fat. By separating out some of that fat, you can reduce the calorie content and create a healthier gravy or sauce. Other benefits include:
- Creates a less greasy, richer flavored gravy or sauce
- Prevents your gravy or dishes from becoming overly fatty or soggy
- Allows you to control the fat content of your finished dish
So while you don’t have to remove every last bit of fat, separating at least some of it can take your gravy and sauces to the next level this holiday season.
Chilling and Skimming Method
One of the easiest ways to separate fat from drippings is by chilling them first Here’s a simple step-by-step guide
What You’ll Need
- Turkey drippings
- Large bowl
- Spoon or fat separator
Instructions
- Let the turkey drippings cool slightly. You want them still warm, not hot.
- Carefully pour the drippings into a large bowl.
- Place the bowl in the refrigerator for 2-3 hours. Overnight is even better if you have time.
- As it chills, the fat will rise to the top and solidify.
- Use a spoon to scoop off just the fatty top layer. Discard the solid fat.
- Alternatively, you can use a fat separator tool by pouring the chilled drippings through the separator. The fat will collect at the top while the defatted drippings come out the bottom.
- Use the drippings in your gravy or sauce recipes as desired.
This method is simple, effective, and doesn’t require any special tools. The only downside is having to plan ahead to allow time for chilling
Gravity Separation Method
If you don’t have time to chill the drippings, you can also separate fat using basic gravity separation. The steps are:
What You’ll Need
- Turkey drippings
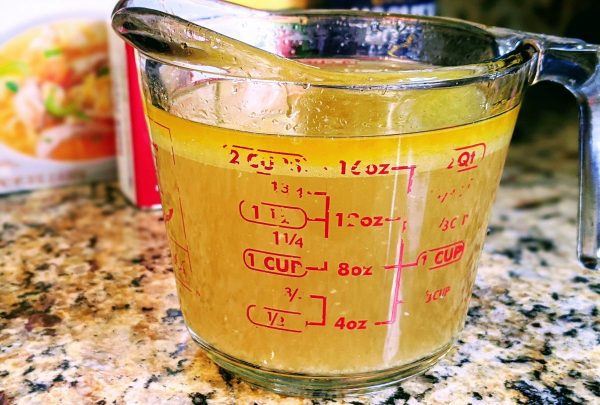
- Large liquid measuring cup or bowl
- Spoon
Instructions
- Allow the hot drippings to sit undisturbed for 5-10 minutes.
- Carefully pour the drippings into a large 4-cup liquid measuring cup or bowl.
- Let them sit for another 5 minutes. The fat will rise to the top.
- Slowly pour the drippings into another container, stopping before you get to the fat layer.
- Alternatively, use a spoon to gently skim the fat layer off the top. Discard the fat.
- Use the defatted drippings as needed in your recipes.
While not quite as effective as chilling, this warm gravity separation method still removes some of the fat quickly and easily. The key is pouring slowly and not disturbing the layers.
Using a Fat Separator
For the easiest separation, use a specialized fat separator tool. These handy items have a spout that drains liquid from the bottom, keeping the fat at the top.
What You’ll Need
- Fat separator
- Turkey drippings
Instructions
- Let the drippings cool slightly so they’re not hot.
- Carefully pour them into the fat separator.
- Let sit 1-2 minutes.
- Place a bowl or liquid measuring cup under the spout.
- Slowly pour out the drippings, stopping before you get to the fat layer.
- Discard the remaining fat.
Fat separators provide fast, convenient separation without extra steps or waiting for chilling. I highly recommend using one if making gravy is part of your holiday tradition.
Try a Gravy Separator
If you don’t have an actual fat separator, a gravy separator can work almost as well. They are small strainers designed to catch drippings with a collector underneath.
To use a gravy separator:
- Place it over a bowl or liquid measuring cup.
- Slowly pour in the warm drippings.
- The fat will float on top while the drippings drain through.
- Discard the fat remaining on top when finished.
Gravy separators are inexpensive and do a decent job separating fat without extra equipment. Look for one with a fine mesh to catch even small fat particles.
alternative Methods without Specialty Tools
Don’t have anything on hand to help separate the fat? No worries – some basic kitchen items can also get the job done in a pinch:
- Turkey baster – Use a turkey baster to suction fat off the top of chilled drippings. It takes a little time but works.
- Spoon – Carefully spoon solidified fat off chilled drippings and discard. Be slow and gentle to avoid picking up drippings.
- Cheesecloth – Line a mesh strainer with cheesecloth. Pour warm drippings through to collect fat in cheesecloth.
- Freezer bag – Let drippings cool in a freezer bag, then snip corner and drain defatted liquid out.
While not as fast or efficient as a tool, these common items can help reduce some fat from the drippings. Get creative extracting fat with what you have on hand!
Tips for Success
To get the best results when separating fat from drippings, keep these tips in mind:
-
Always start with drippings that have cooled slightly – you don’t want them piping hot. Warm or room temperature is ideal.
-
Let drippings rest for a few minutes before separating to allow fat to fully rise to the top.
-
Move slowly and gently when pouring or skimming to keep the liquid and fat layers intact.
-
If chilling, refrigerate overnight to allow fat to completely solidify.
-
Use a fine mesh strainer or cheesecloth to catch small particles of fat.
-
Accept that a small amount of fat will remain in the drippings after separating. This adds flavor.
-
Never pour hot fat directly into the sink – allow it to cool and solidify before discarding.
Separating out even a portion of the fat can reduce calories and enhance flavors. Follow these tips for your best results.
Get Creative Using the Defatted Drippings
Once you’ve removed some of that excess fat, get creative with how you use those delicious drippings. Here are just a few ideas:
- Make gravy for Thanksgiving dinner.
- Whip up a savory turkey soup or stew.
- Simmer into a flavorful pan sauce for roasted turkey breast.
- Use as the liquid when making turkey rice pilaf or risotto.
- Mix with your stuffing recipe for added moisture and flavor.
- Add to cornbread, biscuit, or other baking mixes.
- Use for sautéing vegetables, onions, mushrooms.
- Create a unique turkey maple glaze for chicken or pork.
- Mix with cream or broth for a fast turkey pot pie filling.
Defatted drippings are highly versatile in the kitchen. So put them to good use in your favorite recipes this holiday season and beyond. Get creative with healthy, delicious ways to incorporate that amazing turkey flavor into meals all year round.
While turkey drippings add incredible flavor, they can also add more fat than desired. Luckily, there are many easy methods to separate fat from the drippings quickly and easily.
Simple chilling, gravity separation, and the use of specialty tools like fat separators can all help reduce excess fat before using those drippings in your holiday dishes. Even common kitchen items can work in a pinch.
Remember to let drippings cool, move slowly, and accept some fat will remain. Creative use of the defatted drippings can enhance the flavor of gravies, sauces, soups, and more for healthy holiday meals.
So don’t let fatty drippings go to waste this season. Try out these tips for separating fat and enjoy delicious turkey flavor all holiday long without the excess grease. Your waistline and tastebuds with both thank you!
How to Make Gravy From Turkey Drippings Video
Craving more than gravy? Subscribe to My Kitchen Escapades to get new recipes and a weekly newsletter delivered straight to your inbox! You can also stay in touch on TikTok, Instagram, Facebook, Pinterest, and YouTube for all the latest updates!
Do I have to separate the fat from the drippings?
If you want the smoothest, creamiest turkey gravy, yes you do. There are some recipes that have you make the gravy directly in the roaster pan, but I know from experience that doing so will create lumps.
Separating the fat is very simple. First, you pour the drippings through a strainer into a medium sized bowl then let it sit for a few minutes. The fat will rise to the top and you can skim it off with a spoon. But do NOT throw that fat away because it is the base for your gravy!
If you want to make it even easier, you can purchase a gravy fat separator which pours from the bottom of the drippings, leaving the fat behind.

How to quickly separate fat from pan drippings
FAQ
Should I separate the fat from turkey drippings?
How to make a homemade fat separator?