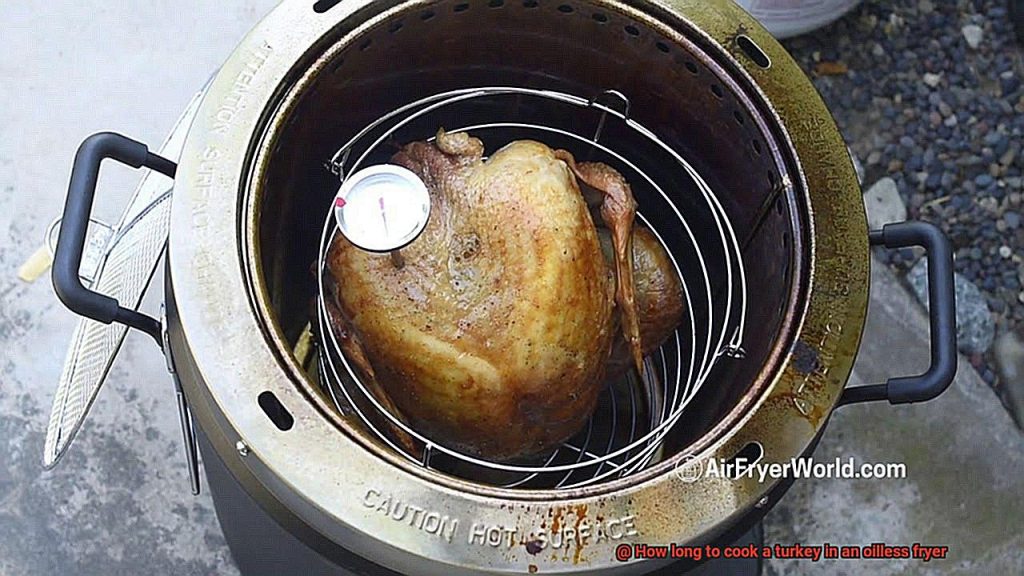
Every year, for the past 16 years, we’ve deep-fried a turkey for Thanksgiving. It took a near-accident around year 2 for us to realize that there must be a better way than to dangerously heat up 6 gallons of cooking oil on my front porch!
As the holidays approach, thoughts turn to festive gatherings with family and friends And a highlight of many celebrations is a golden brown turkey with crispy skin and tender, juicy meat
While traditional oven roasting certainly produces a tasty bird an oilless turkey fryer offers key advantages
- Shorter cook time
- No messy clean-up of hot oil
- Moist, delicious meat
If you’re new to oilless turkey frying, you likely have questions. The main one: How long should you cook a turkey in an oilless fryer to get ideal doneness?
Below, you’ll find a complete guide to oilless fried turkeys—including cook times, tips, and serving suggestions.
What is an Oilless Turkey Fryer?
An oilless turkey fryer uses radiant heat to cook the bird. The fryer box concentrates infrared energy, quickly browning the skin and thoroughly cooking the meat.
Popular brands like the Char-Broil Big Easy use propane heat and reach up to 16,000 BTUs. The turkey sits in a wire basket, allowing hot air to circulate completely around it. A drip tray under the basket neatly catches juices.
Benefits of oilless turkey frying include:
-
No risk of hot oil spills or splatter burns. Oil-based deep frying poses safety risks. An oilless fryer eliminates that danger.
-
Shorter cook time. A turkey fries more quickly than it roasts. Expect approximately 10-15 minutes per pound with an oilless fryer.
-
Moist, delicious meat. The radiant heat cooks the turkey evenly throughout, sealing in moisture. Both white and dark meat turn out juicy.
-
Easy clean-up. With no bulky pot of hot oil to dispose of safely, clean-up takes just minutes.
Cook Time Guidelines for Oilless Turkey Fryers
The total cook time for your turkey depends on two factors:
- Turkey size
- Outside air temperature
Here are general guidelines:
For a 12-16 pound turkey:
-
60-90 minutes at an air temp of 60-70°F
-
90-120 minutes at an air temp of 40-50°F
For a 16-20 pound turkey:
-
90-120 minutes at an air temp of 60-70°F
-
120-150 minutes at an air temp of 40-50°F
Monitor the internal temperature at the turkey’s thickest part. Remove from the fryer when it reaches 165°F. Then, tent with foil and let rest 15-20 minutes before carving.
If using a meat thermometer, insert it into the thickest section of the thigh, taking care not to hit bone. For whole turkeys, aim for the innermost part of the thigh and wing.
Turkey Prep Tips for Oilless Frying
Proper prep ensures your bird fries up tender and delicious. Follow these tips:
-
Completely thaw the turkey. Allow 24 hours in the fridge for every 4-5 pounds. Thawing at room temperature can cause bacterial growth.
-
Dry the skin. Pat the turkey dry inside and out with paper towels. Dry skin crisps up better.
-
Brush on oil. Use a basting brush to lightly coat the skin with olive oil or melted butter. The oil encourages browning.
-
Season generously. For best flavor, rub the cavity and skin with poultry seasoning, herbs, and spices. Avoid sugar, as it can burn.
-
Inject marinade for extra juiciness. Using an injector, infuse the breast and thighs with low-sodium chicken broth, melted butter, or oil-based marinade.
-
Tuck the wings. Fold the wing tips under to hold them close to the body. This prevents charring.
-
Use a flavor stand. Placing citrus, herbs, or aromatics in the stand releases flavorful steam.
With proper thawing, drying, seasoning, and tucking, your turkey is ready for the fryer.
Step-By-Step Oilless Turkey Frying Instructions
Frying up the perfect bird is easy with an oilless turkey fryer. Just follow these simple steps:
1. Set up the fryer
Perform initial fryer setup and seasoning per the manufacturer instructions. This may involve:
- Attaching the legs and propane tank
- Wiping the interior with oil
- Heating to burn off residue
Position the fryer in a safe outdoor location away from structures, trees, and debris.
2. Prepare the turkey
Thaw, dry, season, and tuck the turkey as described in the prep tips above.
3. Preheat the fryer
Heat the oilless fryer for 15-20 minutes prior to adding the turkey. Use maximum heat to reach full temperature.
4. Add flavoring (optional)
Place your choice of fruit, herbs, onions, or aromatics in the removable flavor infusion stand. Citrus, rosemary, thyme, and sage work well.
5. Place the turkey in the basket
Set the seasoned turkey in the fryer basket, breast side up. Lower the basket into the heated fryer.
6. Fry the turkey
Fry the turkey for approximately 10-15 minutes per pound, adjusting time based on size and air temp.
7. Check the temperature
About 15 minutes before the estimated finish time, insert a meat thermometer into the thickest part of the thigh. It should reach 165°F.
8. Remove turkey and rest
When done, use oven mitts to remove the basket. Tent turkey with foil and let rest 15-20 minutes.
9. Carve and serve
Carve the turkey and serve it with your favorite holiday sides. Enjoy!
And that’s all there is to oilless turkey frying success. Store any leftovers within two hours.
Handy Equipment to Have on Hand
Frying turkey requires minimal gear. Handy items to have on hand include:
-
Meat thermometer: Monitor doneness and ensure food safety. Use an instant-read or probe thermometer.
-
Oven mitts: Protect your hands when handling the hot basket and fryer. Look for long, insulated mitts.
-
Basting brush: Apply a light coating of oil to the turkey skin before frying. Silicone brushes are durable.
-
Injector: Infuse flavorful liquid deep into the turkey breast and thighs.
-
Carving tools: A sharp carving knife and sturdy fork make serving up turkey easy.
Serving Suggestions for Fried Turkey
Fried turkey offers incredible flavor and texture straight out of the fryer. But you can also incorporate it creatively into these dishes:
-
Slice the breast meat and serve on sandwiches with cranberry sauce, mayo, and stuffing.
-
Dice or shred the meat and add to casseroles, pasta, soups, or salads.
-
Make nachos, tacos, empanadas, or enchiladas with shredded turkey.
-
Top pizza or flatbread with sliced turkey, cheese, and veggies for a festive meal.
-
Fold turkey pieces into an omelet or frittata along with veggies and cheese.
However you serve your oilless fried turkey, it’s sure to be a hit. Enjoy this quick and easy holiday cooking method.

Choosing the Perfect Turkey for Deep Frying Without Oil

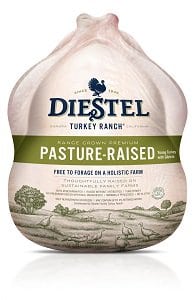
Their sustainable practices have earned the company a 5+ welfare rating, the highest possible rating from the nonprofit Global Animal Partnership. You can find their turkeys at Whole Foods or on their website. The bird we used in the photos for deep frying turkey without oil is from Diestel – last year, they sent over a Pasture-Raised turkey and a fully cooked turkey for us to try. Since then, we’ve purchased a Diestel turkey from Whole Foods and plan on another one this Thanksgiving.
Also, if you’re not into cooking a whole turkey, they do sell already cooked whole turkey, that you can just warm up in the oven and serve.
Here’s the Problem with Brining Turkey:
- Submerging the turkey in brine water means you won’t get super-crispy skin. The skin is full of water, the meat just under the skin is full of brine water. If you decide to deep fry turkey WITH oil…that combination spells trouble Water + massive vat of boiling oil = danger. Lowering a brined turkey (even if you pat the skin very dry) into the oil will produce skin-burning splatters. The oil will continue to bubble fiercely for at least 20 minutes. It’s dangerous.If you are making deep fried turkey without oil, the infrared heat will spend its time evaporating the water on the skin, instead of crisping the skin. Even if you are oven-roasting a brined turkey, it’s difficult to get crispy skin, even if you turn up the heat in the last stage of cooking.
- Brining a turkey in a cooler requires babysitting. You need to keep an eye on the temperature of the water, to ensure it doesn’t go above 40ºF. Have a bag of ice on hand and refill with ice as needed. Adding ice also means you’ll be diluting the brine, so you’ll have to add more concentrated brine solution. Also, do you have room in the freezer for a big bag of ice?
- Brining a turkey is a mess. The cooler has to be thoroughly cleaned and bleached before and after brining.
- If you are still set on brining, count on starting the brine 2 days prior to Thanksgiving. On day 1, brine. On day 2, discard the brine, pat the turkey very dry inside and outside. Place the turkey in a roasting pan, and refrigerate, uncovered, for at least 12 hours. This process will allow the turkey skin to dry, to help you produce that desired crispy skin.
How to Cook Turkey In Char Broil Big Easy Turkey Fryer
FAQ
How long does it take to cook a turkey in an oil-free fryer?
How long does it take to cook a turkey in a char broil oil less fryer?
