Butchering a turkey yourself can seem like a daunting task, but with the right preparation and tools, anyone can learn how to humanely process these large birds step by step. As a homesteader, being able to butcher your own poultry provides a number of benefits like knowing exactly where your food comes from and saving money on grocery bills. In this comprehensive guide, I’ll walk through every step of how to butcher a turkey from start to finish.
Why Should You Butcher Your Own Turkey?
Raising turkeys on your homestead and butchering them yourself offers several advantages over buying pre-butchered turkey from the grocery store:
-
Cost savings – You’ll save significantly compared to buying an organic, free-range turkey. The poults are inexpensive to buy as day-olds and you can feed them for pennies a day.
-
Quality – Pasture raised heritage breed turkeys have more flavor and nutrition than commercial breeds You control what they eat so you know it’s healthy
-
Humane treatment – You can raise them free range and process them humanely on your property. Commercial turkeys are often raised in crowded, stressful conditions.
-
Sustainability – It’s the essence of farm-to-table. You’re eliminating transportation processing and packaging waste.
-
Skill building – Butchering your own poultry is a valuable homesteading skill and you’ll gain confidence with practice.
Step 1: Prepare Your Supplies and Butchering Area
Processing a turkey is easiest with two people – one to hold and pluck while the other cuts. Before you begin, gather all of the necessary supplies:
- Sharp knives (boning knife, butcher knife)
- Poultry shears
- Killing cones or rope/twine for hanging
- Large pots for scalding
- Plucking station with solid surface
- Eviscerating table
- Food-grade containers for offal
- Ice water bath container
- Freezer bags and paper
- Disinfectant and hand soap
- Gloves and aprons
Set up your stations in an organized processing area. Make sure you have ample space to move between stations efficiently. Have all your tools staged nearby and ready for each step.
Step 2: Killing and Bleeding Out
The most humane way to dispatch a turkey is hanging it upside down. Gently lower the turkey head first into a killing cone or tie its legs securely to a branch or pole. Make a cut across the neck just below the head to sever the arteries. Allow the bird to bleed out completely before moving on to the next step, about 5 minutes. This ensures the birds doesn’t suffer and all blood drains from the carcass.
Step 3: Scalding and Plucking
Submerge the turkey in a pot of 145-150°F water for 45-90 seconds. This makes the feathers release from the follicles. Hang the bird up again and immediately begin plucking while the bird is still warm. The feathers should come out easily in large clumps if properly scalded. Use gloves and pluck against the direction of feather growth. Go over the entire body multiple times to remove all feathers. Any stubborn ones can be removed with pliers.
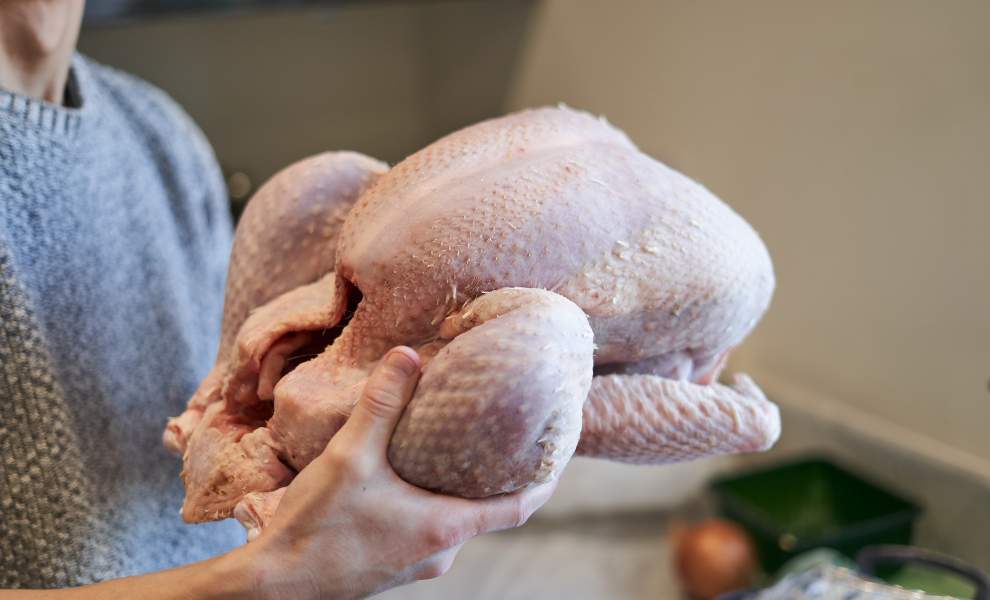
Step 4. Evisceration and Cleaning
Lay the plucked turkey on a clean table for evisceration. Start by removing the head and feet with shears or a knife. Then make an incision around the anus without puncturing intestines. Cut up the belly midline being careful not to cut internal organs. Reach in and pull out all internal organs in one bundle. Scrape out any remaining bits from the cavity and rinse under cold water. Chill the carcass in an ice bath to quickly lower temperature.
Step 5. Breaking Down the Turkey
Once thoroughly chilled, the turkey can be broken down into parts. Remove each leg by cutting through the hip joint and separate the drumstick from thigh. Slice along either side of the breastbone to remove each breast half. You can leave wings attached to breasts or sever at the joints. Rinse all parts again and pat dry with paper towels.
Step 6. Packaging and Freezing
Place turkey pieces in freezer bags or vacuum seal bags, removing as much air as possible. Smaller portions will freeze faster. Place packages in freezer allowing space for air circulation while freezing. Properly packaged, frozen turkey will last 9-12 months. Always thaw in fridge before cooking.
Step 7. Make Use of the Offal
Don’t let any parts of your homegrown turkey go to waste. Here are some uses for the organs and trimmings:
- Make broth from the carcass
- Cook heart, liver, and gizzard just like chicken giblets
- Use extra fat and skin for schmaltz
- Feed scraps to dogs, cats, or pigs
- Compost anything leftover
Butchering your own turkeys requires time and physical effort, but the end result is incredibly rewarding. With proper handling, equipment, and techniques you’ll be able to put high-quality, homegrown meat on your Thanksgiving table. The more birds you process, the more efficient and confident you’ll become.
Nutrition Info (Per 100 grams)
- Calories: 141
- Protein: 22g
- Fat: 15g
- Carbs: 0g
- Vitamin B6: 30%
This recipe makes 1 serving. Get this recipe on myfitnesspal.com.
What Do You Need Before Attempting to Butcher a Turkey?
The reason I choose to not cook a whole turkey is because, for starters, my oven can barely fit the bird. Most Indian folk don’t own an oven, let alone use it. If you notice there are hardly any bakes or casseroles or any oven dishes in Indian cooking. If there are it’s mostly giant clay ovens like the tandoor. So for starters it’s not a common appliance to own. Those who do own it, like myself will generally have at best a small one or in my case a 52 liter one which still isn’t big enough. That’s because most of us living in cities live in apartments which aren’t built with massive kitchens.
Now technical and cooking apparatus aside, the cooking time. White meat and dark meat, the two sides of any poultry. When you roast a whole bird, it’s inevitable to not have perfect cooking. How is it possible? Dark meat, legs and thighs cook differently than the breast (the white meat). Breaking down the bird allows us to cook them separately resulting in a better final cooked product. And that is why I’m butchering this turkey before cooking it.
Before we start on how to butcher a turkey at home, you need to grab the following:
- A sharp butchering knife
- Sharp kitchen scissors
- Roasting tray with a wire rack
I sourced my turkey online from Sweet Stuff, weighing 5 kg.
You can also try the local supermarket to grab yours.
Butchering Turkeys For the First Time ||How to Process a Turkey & Supplies Needed||
FAQ
How long should a turkey hang before butchering?
What is the most humane way to butcher a turkey?